In summary:
- The Quebec spring thaw creates unique sanitation challenges (mold, allergens, water infiltration) that standard cleaning routines miss.
- A proactive, chemical-free approach focusing on moisture control, targeted disinfection, and air purification is essential for family health.
- Key actions include managing basement humidity, understanding the science of natural cleaners, and maintaining exterior elements like gutters.
- Adopting a systematic sanitation protocol protects your home and health from the specific microbial threats of the season.
The first signs of the Quebec spring thaw bring a collective sigh of relief. The snow melts, the days lengthen, and the promise of warmer weather is in the air. For many families, this signals the start of “spring cleaning”—a ritual of airing out the house and wiping away winter’s dust. But as a residential hygienist, I know this seasonal shift is more complex. The rapid melt, saturated ground, and fluctuating temperatures create a perfect storm for hidden household threats that go far beyond simple dust bunnies. The musty smell from the basement, the sudden spike in allergy symptoms, and the stubborn grime aren’t just annoyances; they are symptoms of a deeper issue.
Many guides will offer generic advice: open windows, use bleach, or declutter. While well-intentioned, these tips often fail to address the specific environmental pressures of a Quebec thaw. They overlook the intense hydrostatic pressure building against your foundation, the explosion of mold spores in damp spaces, and the accumulation of winter road salt and grime that gets tracked inside. This is particularly concerning for mothers who are rightly worried about their children’s respiratory health and the long-term effects of a home’s air quality.
The true key to a healthy home during this transition isn’t about cleaning harder, but cleaning smarter. It’s about shifting from a reactive cleaning mindset to a proactive sanitation protocol. This guide is built on that principle. We will move beyond surface-level tips to explore the ‘why’ behind the ‘what’. We’ll dissect the specific risks posed by the thaw, from mold in the basement to allergens in your bedding, and provide effective, evidence-based sanitation strategies that don’t rely on a cabinet full of harsh chemicals. This is about empowering you with the knowledge to create a truly safe and healthy environment for your family, season after season.
This article provides a structured approach to home sanitation during the thaw. Below is a summary of the key areas we will cover to help you protect your home and family effectively.
Summary: A Hygienist’s Guide to Quebec Thaw Home Sanitation
- Why Does the Spring Thaw Trigger Mold Growth in Quebec Basements?
- How to Disinfect Your Home Effectively After a Viral Infection Outbreak?
- HEPA Filters vs UV Sanitizers: Which Technology Best Protects Your Bedroom Air?
- The Common Bleach Mistake That Creates Toxic Fumes in Small Bathrooms
- How to Sanitize High-Touch Surfaces in 10 Minutes a Day for Busy Families?
- How to Wash Bedding and Curtains to Kill 99% of Allergens Effectively?
- How Do Clogged Gutters Contribute to Ice Formation Under Shingles?
- Why Standard Cleaners Fail to Remove Limescale in Areas with Hard Water?
Why Does the Spring Thaw Trigger Mold Growth in Quebec Basements?
The characteristic musty smell in a Quebec basement during the spring thaw is a direct result of a sudden increase in moisture. As massive quantities of snow melt, the ground becomes saturated. Because the lower layers of soil may still be frozen, this water has nowhere to go, creating immense hydrostatic pressure against your home’s foundation walls. Even microscopic cracks can become entry points for water, leading to dampness, pooling, and the ideal breeding ground for mold. The financial consequences of this can be staggering; basement seepage issues are a significant concern for homeowners, with damages that can be extensive.
Mold isn’t just an unsightly nuisance; its spores are potent allergens and respiratory irritants. For families with children, especially those with asthma or other respiratory conditions, controlling this microbial growth is a non-negotiable health priority. The problem is often invisible, thriving behind drywall or under flooring. A proactive approach is crucial. This involves not just cleaning, but creating an environment hostile to mold. Maintaining a basement humidity level between 30-50% using a quality dehumidifier is the first line of defense. The case of a family in Notre-Dame-de-l’Île-Perrot highlights this; they faced severe mold affecting their child’s health, a problem solved only by a complete moisture control system including a dehumidifier and vapor barrier, which kept their crawl space dry even during the worst thaw on record.
Therefore, your focus during the thaw shouldn’t be on waiting for musty odours to appear, but on aggressively managing moisture. Inspect your basement weekly for any signs of dampness on walls or floors, ensure your sump pump is functioning correctly, and run a dehumidifier consistently. This turns your basement from a mold incubator into a controlled, dry space. According to the Canadian Government, water damage can be a costly affair, with basement seepage damage averaging over $40,000, making prevention not just a health strategy, but a financial one.
How to Disinfect Your Home Effectively After a Viral Infection Outbreak?
When a cold or flu sweeps through the family, the immediate focus is on care and comfort. But once the fevers subside, the second battle begins: eradicating the lingering germs to prevent a relapse or spread. Many people reach for aggressive chemical disinfectants, believing harshness equals effectiveness. However, a strategic, natural approach can be just as potent without introducing volatile organic compounds (VOCs) into your home’s air. The goal is to break the chain of infection by targeting high-touch surfaces and improving air quality, which is especially important after a winter of closed windows.
The first step is a “purge and ventilate” strategy. During the warmest part of a sunny day, open windows on opposite sides of the house for at least 15-30 minutes to create a cross-breeze. This air exchange helps to dilute the concentration of airborne viral particles. Next, focus on disinfection. A simple but powerful solution can be made with one part white vinegar to two parts water, with a few drops of a natural antimicrobial essential oil like thyme or pine. This solution is effective for wiping down surfaces, but it’s crucial to let them air dry; the drying process is part of what allows the natural acids and compounds to neutralize pathogens.
This shift towards mindful, non-toxic cleaning is a common journey for parents. As mother and blogger Kelly Oribine of Red & Honey notes, the arrival of children often prompts a re-evaluation of household chemicals:
When I got married, I honestly didn’t care about having non-toxic cleaning products… After kids, I thought twice about our household cleaners. Surely the things we breathe and come into contact with on a daily basis would affect our health, right?
– Kelly Oribine, Red & Honey Blog
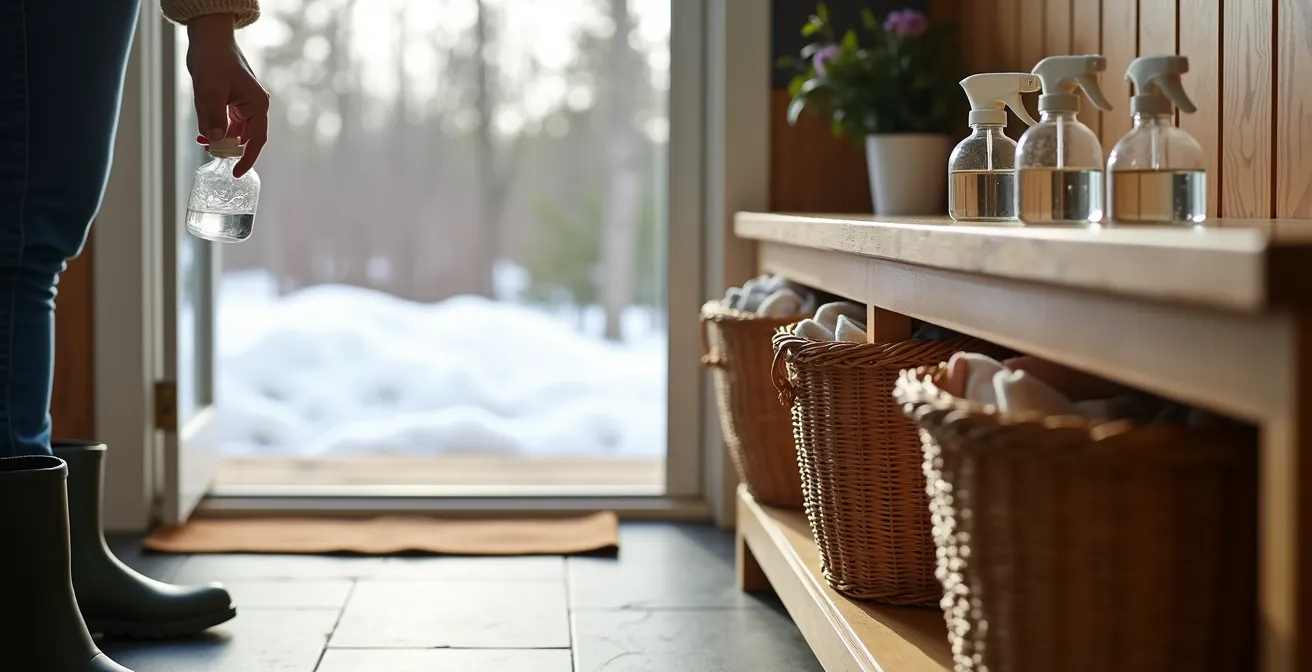
Focus this natural sanitization on “transition zones” like the mudroom and entryways, where winter gear has accumulated moisture and germs. Systematically wipe down all doorknobs, light switches, remote controls, and cabinet handles. This targeted, methodical approach ensures that you are disrupting the virus’s ability to survive on surfaces without unnecessarily saturating your home with chemicals.
HEPA Filters vs UV Sanitizers: Which Technology Best Protects Your Bedroom Air?
Improving indoor air quality is paramount, especially in bedrooms where we spend a third of our lives. During the Quebec thaw, the air becomes a cocktail of threats: lingering winter viruses, newly released mold spores from damp ground, and the first wave of pollen from trees like birch and maple. Two technologies dominate the air purification market: HEPA filters and UV sanitizers. Understanding their different mechanisms is key to choosing the right protection for your family.
A High-Efficiency Particulate Air (HEPA) filter is a mechanical barrier. Think of it as an extremely fine net that physically traps particles. A true HEPA filter is certified to capture 99.97% of particles as small as 0.3 microns. This makes it incredibly effective against the primary culprits of the thaw season: mold spores, dust, and pollen. It physically removes them from the air you breathe. The downside is that filters require regular maintenance; during high-pollen seasons or a thaw, you may need to replace them more frequently to maintain effectiveness.
UV sanitizers, often using UV-C light, work on a completely different principle. They don’t trap anything. Instead, they use ultraviolet radiation to destroy the DNA or RNA of microorganisms like bacteria and viruses, rendering them unable to reproduce. This is excellent for neutralizing airborne pathogens. However, UV light is ineffective against non-living particles like dust, pollen, or dander. It doesn’t remove them from the air. For a home with an HRV (heat recovery ventilator) or forced-air system, UV units can be integrated to sanitize the air as it circulates.
For the specific challenges of a Quebec spring, a hybrid approach or a HEPA-based system is generally superior for a bedroom. The primary health concern for many families is the high particulate load of allergens. A HEPA filter directly addresses this by trapping the spores and pollen. Some advanced units incorporate both technologies, using HEPA to capture particles and a UV lamp to neutralize any living microbes caught in the filter.
The following table breaks down the key differences to help you decide which technology best fits your family’s needs during the spring thaw.
| Feature | HEPA Filters | UV Sanitizers |
|---|---|---|
| Best for Quebec Thaw | Captures mold spores, dust, early pollen (birch, maple) | Neutralizes airborne viruses from winter confinement |
| Effectiveness | 99.97% particle removal at 0.3 microns | Kills bacteria/viruses but doesn’t remove particles |
| Maintenance During Thaw | Replace filters more frequently due to maximum load | Check UV bulb effectiveness yearly |
| Integration with HRV | Works alongside heat recovery ventilators | Can be integrated into forced-air systems |
| Recommended Humidity Level | Maintains 30-50% with dehumidifier support | No direct humidity control |
The Common Bleach Mistake That Creates Toxic Fumes in Small Bathrooms
In the quest for a sparkling, disinfected bathroom, many people unknowingly create a serious chemical hazard. The mistake is mixing chlorine bleach with another common cleaner: ammonia. This combination, whether intentional or accidental (by cleaning one surface after another), produces chloramine gas. In a small, poorly ventilated space like a bathroom, these fumes can cause immediate and severe respiratory irritation, coughing, and shortness of breath. Safety experts are unequivocal on this point: you must never mix ammonia and bleach, as the resulting chlorine gas is highly toxic.
The danger doesn’t stop with ammonia. Mixing bleach with acidic cleaners, including simple white vinegar, can also release toxic chlorine gas. This is why a “more is better” approach to cleaning is so risky. The safest protocol is a “one at a time” rule. If you must use multiple products, you should apply one, rinse the surface thoroughly with water, and allow it to dry completely before applying the next. This prevents chemical reactions on the surface itself.
A safer and highly effective strategy for bathroom sanitation involves using products that don’t react dangerously. Hydrogen peroxide (3% solution, commonly available) is an excellent disinfectant. You can spray it on surfaces like countertops, toilets, and showers, and let it sit for several minutes before wiping. For limescale and soap scum, white vinegar is the superior choice. The key is to use them sequentially, not simultaneously. For example, disinfect with peroxide first, let it dry, then tackle mineral deposits with vinegar. This two-step process addresses both microbial and mineral issues without creating a toxic environment for your family.
Always ensure proper ventilation before starting any bathroom cleaning. Open a window if possible and always turn on the exhaust fan. This simple step is your most important safety measure, rapidly diluting any fumes and protecting your lungs. By understanding basic chemical interactions, you can achieve a higher standard of clean more safely.
How to Sanitize High-Touch Surfaces in 10 Minutes a Day for Busy Families?
For busy parents, the idea of daily, deep sanitation can feel overwhelming. The secret isn’t finding more time; it’s about creating a hyper-efficient routine that targets the most critical areas in just a few minutes. During the Quebec thaw, the “high-touch” surfaces extend beyond the usual suspects. Think about the journey from the slushy outdoors to the cozy indoors: car door handles caked with road salt, mudroom benches, boot trays, and the buttons on your HRV control panel. A 10-minute daily “sanitation sweep” can drastically reduce the microbial load in your home.
The strategy is to have your tools ready. Keep a designated basket with a natural all-purpose spray and a few clean microfiber cloths. Divide your 10 minutes into focused zones. Spend the first two minutes in the mudroom, wiping down the bench, coat hooks, and any boot trays to remove salt and grime. The next two minutes can be for all door handles (interior and exterior) and light switches in your main traffic path. Dedicate another two minutes to the car, quickly wiping the steering wheel and door handles. The final four minutes can be for the kitchen and bathroom hotspots: faucets, toilet flushers, and countertops.
This approach transforms a daunting chore into a manageable daily habit. It’s about consistency, not intensity. This mindset resonates deeply with parents who are conscious of their home environment. The desire to use effective, safe, and waste-reducing products is a powerful motivator.
A Parent’s Testimony on Switching to Natural Products
One mother shared her experience, reflecting a common sentiment: “When I became pregnant I really started to think about the products we used in our home and how they would affect my baby. We love them! They smell great! They are effective! And we love that they reduce waste!” This highlights the emotional and health-driven reasons behind choosing simpler, non-toxic solutions that fit into a family’s life.
By focusing on these key transmission points, you are strategically interrupting the path of germs and allergens tracked in from the outside. This small, consistent effort pays huge dividends in maintaining your family’s health throughout the challenging thaw season, proving that effective sanitation doesn’t require hours of work, just a few minutes of focused attention.

How to Wash Bedding and Curtains to Kill 99% of Allergens Effectively?
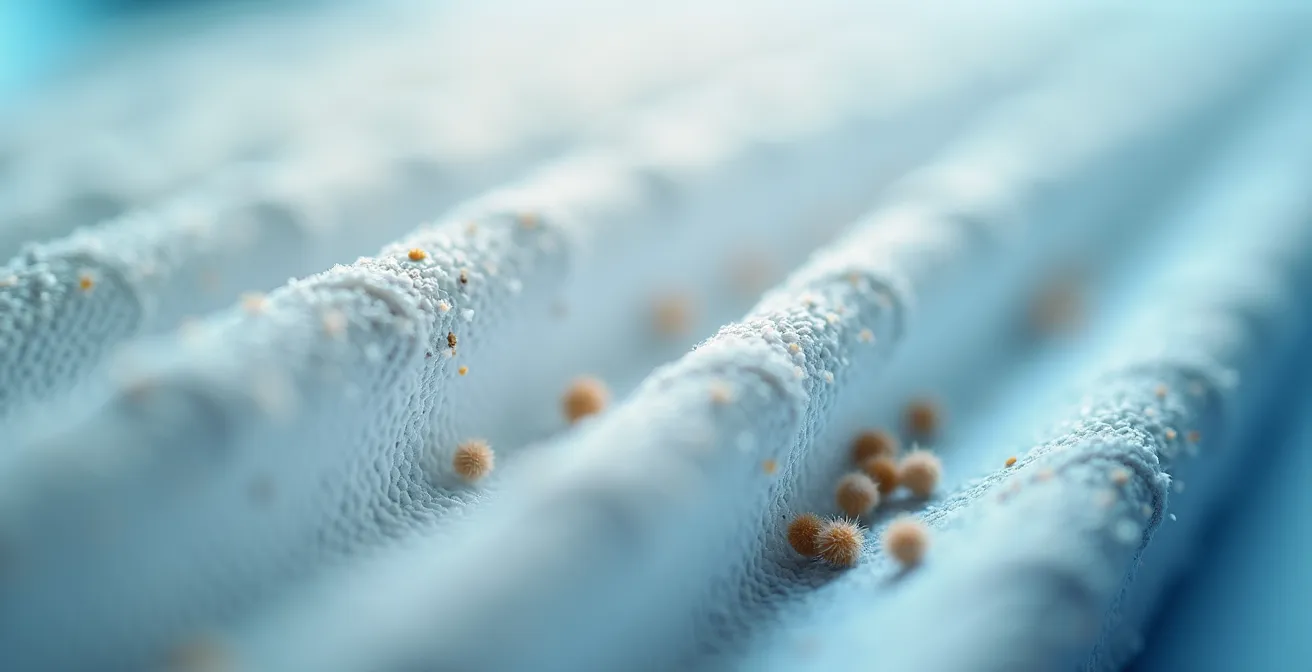
Bedding and curtains act as giant filters, trapping dust, pet dander, pollen, and, most significantly, dust mites. These microscopic arachnids thrive in warm, humid environments and are a primary trigger for allergies and asthma. During the winter, with windows closed, their populations can build up. A proper “deep clean” of these textiles at the start of spring is one of the most impactful actions you can take to improve your home’s air quality and reduce allergy symptoms.
The key to effectively killing dust mites is not the detergent you use, but the temperature of the water. To eradicate them completely, you must wash your linens in hot water. Research shows that washing bed linens in hot water at 60°C/140°F or higher is necessary to kill dust mites and denature their allergenic proteins. Many modern washing machines have a “sanitary” or “allergen” cycle that reaches this temperature. If yours doesn’t, simply select the hottest setting available. This applies to all bedding: sheets, pillowcases, duvet covers, and mattress protectors.
For an added boost, you can add one cup of white vinegar to the rinse cycle. Vinegar acts as a natural fabric softener and helps to break down any remaining detergent residue and mineral deposits, leaving fabrics softer without the use of chemical softeners that can irritate sensitive skin. After washing, the drying process is just as critical. Tumble dry everything on a high heat setting. The sustained high heat ensures any surviving mites are eliminated. For curtains, first vacuum them thoroughly with a brush attachment to remove loose dust and early spring pollen that may have drifted in. If they are machine-washable, follow the same hot water protocol. If not, professional steam cleaning is an effective alternative.
Your Action Plan: Post-Winter Textile Deep Clean
- Strip Winter Layers: Gather all heavy winter bedding, including flannel sheets, duvets, and mattress protectors for the first major wash of the season.
- Wash at High Temperature: Use a hot water cycle (minimum 60°C/140°F) to effectively eliminate dust mites and their allergens accumulated over the winter.
- Add Vinegar to Rinse: Pour one cup of white vinegar into the fabric softener dispenser during the rinse cycle to act as a natural softener and help break down allergens.
- Dry on High Heat: Use the highest heat setting your fabrics can tolerate in the dryer. This is a critical step for ensuring complete dust mite eradication.
- Address Curtains: First, vacuum curtains with a brush attachment to remove surface dust. Then, if the fabric allows, wash them following the same hot water and high heat drying method.
By making this textile deep clean a cornerstone of your spring sanitation ritual, you actively remove a massive reservoir of allergens from your living space, contributing to easier breathing and a healthier home environment for your entire family.
How Do Clogged Gutters Contribute to Ice Formation Under Shingles?
It’s easy to think of gutters as a simple component for managing rain, but in a Quebec climate, their role is far more critical, especially during the transition from winter to spring. Clogged gutters, filled with autumn leaves and debris, are the primary cause of ice dams. An ice dam is a ridge of ice that forms at the edge of a roof, preventing melting snow (water) from draining off. This water backs up behind the dam, and because of the freeze-thaw cycles common in spring, it can work its way under your roof shingles and into your attic and walls.
This process is a “time bomb” for water damage. The damage isn’t just structural; that trapped moisture inside your walls and attic is a guaranteed recipe for widespread, hidden mold growth. A case study of a Canadian home highlights this exact scenario: the homeowner found that clogged gutters were the root cause of water backing up under the shingles. This created a situation where a massive amount of water was released into the wall cavities during a rapid thaw. Proactive inspection and gutter cleaning, combined with ensuring proper attic ventilation as per Régie du bâtiment du Québec (RBQ) standards, are the only ways to prevent this costly damage.
The connection to your home’s foundation is also direct. When ice dams melt or overflow, they dump a concentrated volume of water directly against your foundation, overwhelming the drainage system and increasing hydrostatic pressure. This can lead to basement flooding, compounding the moisture problems inside your home. Therefore, maintaining clean gutters is not just about roof health; it’s a fundamental part of your basement waterproofing and mold prevention strategy.
Inspecting your roof and gutters as the snow begins to melt is a crucial preventive step. From the ground, look for signs of lifted shingles, damaged flashing around vents, or water stains on your soffits. These are tell-tale signs that an ice dam may have formed over the winter. Ensuring your gutters are clear before the major melt begins is one of the most effective actions you can take to protect the entire envelope of your home from the destructive power of the spring thaw.
Key takeaways
- The Quebec thaw is an active environmental event requiring specific sanitation protocols beyond general cleaning.
- Moisture control is the number one priority, especially in basements and attics, to prevent costly mold and water damage.
- Effective, chemical-free sanitation is achievable by understanding the science of natural agents and applying them sequentially and safely.
Why Standard Cleaners Fail to Remove Limescale in Areas with Hard Water?
If you’ve ever battled a chalky, white film on your shower doors, faucets, and kettle, you’ve experienced the effects of hard water. This residue is limescale, or calcium carbonate, left behind as water evaporates. Many all-purpose cleaners are simply ineffective against it because they are pH-neutral or alkaline. To dissolve a mineral deposit like limescale, you need an acid. This is why standard cleaners might remove soap scum but leave the mineral buildup untouched, a common frustration for homeowners.
In Quebec, water hardness varies significantly by region. For example, parts of the province are known for having particularly hard water, including areas like Montreal, Gatineau, and the Montérégie. In these locations, a targeted approach to limescale removal is essential for maintaining fixtures and appliances. The most effective, affordable, and non-toxic acid for this job is acetic acid, found in simple white vinegar. Applying undiluted vinegar directly to the deposits and letting it sit for at least 30 minutes allows the acid time to react with and dissolve the calcium carbonate.
For more stubborn, layered deposits, you can create a more potent paste by mixing baking soda with lemon juice (another natural acid). Apply the paste, let it fizz and work for 15-20 minutes, then gently scrub with a soft brush to avoid scratching surfaces. The final, and often-missed, step is to rinse the surface thoroughly and—most importantly—dry it completely with a cloth. Leaving water to air dry is what allows new mineral deposits to form in the first place. By drying your fixtures after use, you significantly slow down the accumulation of new limescale.
This scientific approach—using an acid to counteract a mineral deposit—is the core principle that makes natural cleaning so effective when applied correctly. It’s not about scrubbing harder; it’s about using the right tool for the job. By incorporating this practice into your routine, you can keep your bathrooms and kitchen sparkling, even in the hardest water areas, without resorting to harsh, corrosive chemical cleaners.
By adopting these targeted, science-backed protocols, you transform your spring cleaning from a simple chore into a powerful act of preventative health for your home and family. To ensure your home is fully prepared, conducting a personalized assessment is the logical next step.
Frequently Asked Questions About Home Sanitation and the Quebec Thaw
What causes basement flooding during Quebec spring thaw?
The combination of melting snow, frozen ground preventing absorption, and clogged French drains creates hydrostatic pressure against foundations, leading to water infiltration and mold growth.
How can I prevent ice dams from forming?
Ensure proper attic ventilation according to Régie du bâtiment du Québec (RBQ) standards, maintain clean gutters, and improve attic insulation to prevent heat loss that causes freeze-thaw cycles.
When should I inspect my roof for thaw damage?
Conduct visual ground inspection as snow melts, looking for lifted shingles, damaged flashing around vents, and signs of water staining on soffits indicating ice dam formation.