The persistent yellowing of your facility’s vinyl floors is not a simple product failure; it’s a chemical breakdown accelerated by modern flooring materials and specific Quebec environmental factors.
- “Universal” acrylic waxes often react negatively with the factory-applied urethane coatings on modern Luxury Vinyl Tile (LVT), causing discoloration.
- Quebec’s unique climate—high summer humidity and harsh winter salt—severely compromises wax curing and accelerates surface degradation.
Recommendation: Shift from a generic waxing routine to a material-specific and climate-aware maintenance protocol that includes LVT-compatible sealers and proactive environmental controls.
As a facility administrator for a school or hospital in Quebec, you oversee kilometers of vinyl flooring. You invest significant time and budget into stripping and waxing, expecting a brilliant, durable shine. Yet, weeks or months later, a frustrating yellow tinge appears, particularly in high-traffic areas. You follow the instructions, use professional products, and still, the floors look aged and dirty. This isn’t just an aesthetic problem; it’s a costly cycle of rework that reflects poorly on your facility’s standard of maintenance.
The common culprits—UV exposure, improper cleaning, or simply “bad wax”—are often blamed. While these factors play a role, they are merely symptoms of a deeper issue. The core problem lies in a fundamental mismatch between traditional maintenance practices and the specific chemistry of modern flooring materials like Luxury Vinyl Tile (LVT), compounded by Quebec’s unique environmental challenges. The yellowing you see is often a sign of accelerated chemical degradation, where the floor finish is breaking down at a molecular level.
But what if the solution wasn’t just applying wax better, but understanding *why* it fails in your specific context? This guide abandons generic advice and focuses on the underlying science. We will explore the chemical incompatibility of certain waxes with LVT, the disastrous effect of Quebec’s summer humidity on curing times, and how winter salt becomes a microscopic weapon against your floor’s finish. By understanding these mechanisms, you can move beyond the frustrating cycle of yellowing and implement a targeted protocol that truly protects your flooring investment.
While our guide focuses on the specific chemical reasons for yellowing in high-traffic facilities, it’s crucial to master the fundamentals of floor care. The following video offers a great visual tutorial on proper techniques for cleaning and removing buildup, a foundational skill for any maintenance protocol.
To navigate these complex issues, this article is structured to address the most critical questions a Quebec facility manager faces. We will dissect each problem and provide actionable, evidence-based solutions to build a resilient and effective floor maintenance program.
Table of Contents: A Facility Manager’s Guide to Preventing Vinyl Floor Discoloration
- Why Do Some “Universal” Waxes Fail on Modern Luxury Vinyl Tiles (LVT)?
- How to Apply Wax Without Leaving Streaks or Bubbles on Large Surfaces?
- Matte vs High-Gloss Finish: Which Hides Scuff Marks Better in Hallways?
- The Humidity Mistake That Ruins Wax Curing on Summer Nights
- How to Strip Wax from Vinyl Without Damaging the Glue Underneath?
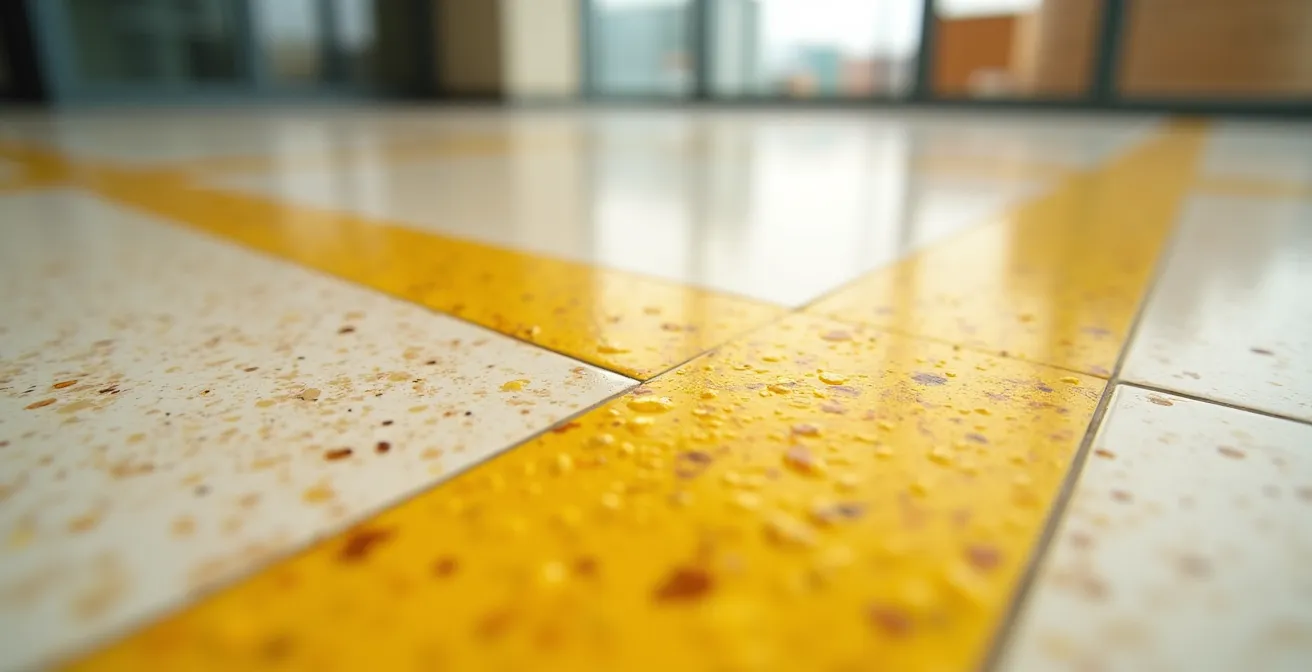
- Why Does Wax Buildup Turn Yellow on VCT Floors Over Time?
- Why Zinc Whiskers from Floor Tiles Are a Silent Killer for Server Motherboards?
- How Does Foot Traffic Turn Salt Grains into Cutting Tools for Wax?
Why Do Some “Universal” Waxes Fail on Modern Luxury Vinyl Tiles (LVT)?
The term “vinyl flooring” is often used as a catch-all, but a critical distinction exists between traditional Vinyl Composition Tile (VCT) and modern Luxury Vinyl Tile (LVT). While VCT is porous and designed to accept multiple coats of acrylic wax, most modern LVT is manufactured with a non-porous, factory-applied urethane coating. This protective layer is the primary reason “universal” acrylic floor finishes fail, leading to yellowing, flaking, and a gummy residue.
Applying a traditional, high-pH acrylic wax over this urethane surface creates a chemical conflict. The wax doesn’t bond correctly; instead, it sits on top like an unstable film. Over time, cleaning chemicals and even simple water can get trapped between the urethane and the wax, leading to a form of chemical breakdown known as alkaline hydrolysis. This process degrades the polymer chains in the wax, causing the distinct yellow or brownish discoloration you observe. Essentially, you are not waxing the vinyl, but an incompatible layer of urethane.
This is a well-understood issue within the industry. As flooring specialist Charles Idowu notes in the CoverTec Products Technical Guide:
LVT floors are a lot more sensitive to stripping and waxing, and a lot of the manufacturers will tell you not to use acrylic and wax finishes because of that exact reason.
– Charles Idowu, CoverTec Products Technical Guide
For facility managers in Quebec, applying the wrong product not only ruins the floor’s appearance but can also void the manufacturer’s warranty, a costly mistake for a large-scale installation. The correct approach is to use products specifically formulated for LVT, such as water-based urethane sealers or specialized polishes that are designed to adhere to the factory finish without causing chemical conflict.
LVT Compatibility Checklist for Canadian Facility Managers
- Verify your LVT manufacturer’s warranty requirements; many void coverage if acrylic waxes are applied.
- Check if your LVT has a factory-applied urethane coating, as these are incompatible with traditional waxes.
- Test any new product in an inconspicuous area (like a closet or under furniture) before full application.
- Source professional-grade, LVT-specific sealers from trusted Canadian distributors.
- Avoid harsh stripping chemicals and aggressive pads that can permanently damage the LVT’s print layer.
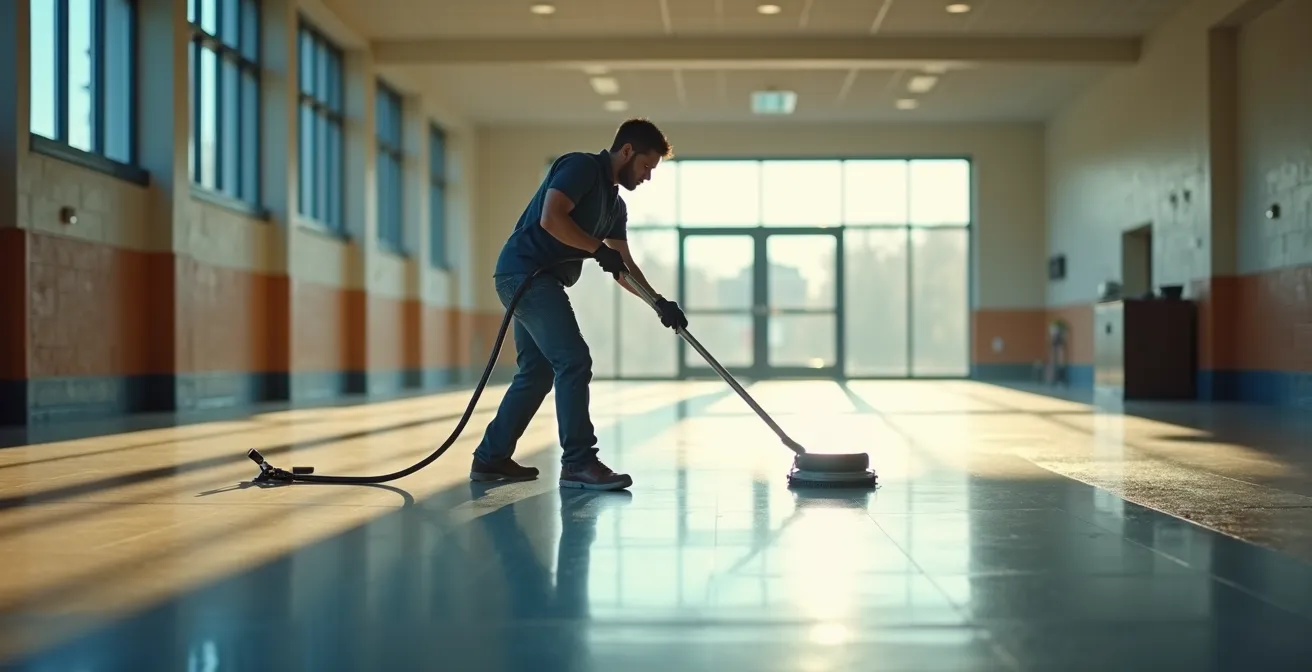
How to Apply Wax Without Leaving Streaks or Bubbles on Large Surfaces?
For a facility manager, achieving a flawless, glass-like finish across thousands of square feet of hallway or gymnasium is the ultimate goal. However, streaks, lap marks, and bubbles are common frustrations that mar the final appearance. These imperfections are rarely due to the product itself but almost always stem from improper application technique, especially on a large scale. The key to a perfect finish is maintaining a “wet edge” at all times.
Professionals in Quebec’s commercial cleaning sector successfully employ the “Leading Edge” technique. This method involves working in manageable sections, typically 10×10 feet, and pouring the finish in a controlled line along the starting edge. Using a specialized T-bar applicator or a high-quality microfiber flat mop, the finish is spread in a single, smooth pass. On the return pass, the applicator slightly overlaps the still-wet previous line. This continuous overlap prevents the edges from drying prematurely, which is the primary cause of lap marks and streaks.
Bubbles, on the other hand, are typically introduced by agitating the finish. Shaking the wax container, pouring it too quickly from a height, or working the applicator back and forth too vigorously can all introduce air into the liquid, which then gets trapped as the finish dries. The finish should be gently poured in a steady stream close to the floor, and the applicator should glide smoothly without being lifted or overworked.
Case Study: Professional Floor Care Protocol for Quebec Commercial Spaces
Many professional cleaning services in Quebec have perfected the “Leading Edge” technique in large facilities. One Montreal shopping mall, for instance, reported achieving completely streak-free results across 50,000 square feet. Their success hinged on two factors: first, using wide T-bar applicators to cover large areas quickly and maintain a consistent wet edge; second, controlling the indoor climate during overnight application. As confirmed by a study of commercial floor care protocols, maintaining a relative humidity between 40-60% is crucial for even drying and preventing application marks, a significant challenge during Quebec’s humid summers.
Matte vs High-Gloss Finish: Which Hides Scuff Marks Better in Hallways?
The choice between a matte and a high-gloss finish is one of the most strategic decisions a facility manager can make, directly impacting both aesthetics and long-term maintenance costs. While a high-gloss finish provides a brilliant, “wet look” that is often associated with cleanliness in environments like hospitals, it comes with a significant drawback: it highlights every single imperfection. In a high-traffic school or hospital corridor, a high-gloss floor acts like a mirror for scuff marks, scratches, and the fine abrasions left by winter salt.
A matte or satin finish, by contrast, is far more forgiving. Its low-sheen surface diffuses light rather than reflecting it directly. This optical effect makes scuff marks from shoes, cart wheels, and equipment significantly less visible. For busy hallways, entrances, and common areas in Quebec facilities, a matte finish maintains an acceptable appearance for much longer, reducing the frequency of burnishing and buffing required to restore the floor. This translates directly into lower labor costs and less disruption to operations.
Furthermore, matte finishes offer better slip resistance when wet, a critical safety consideration. The decision ultimately comes down to a trade-off: the “wow factor” of a high-gloss finish versus the practical, low-maintenance durability of a matte one. For most high-traffic zones, the operational benefits of a matte finish outweigh the aesthetic appeal of high gloss.
This comparative analysis breaks down the key performance differences for facilities in Quebec, factoring in local challenges like winter salt and associated maintenance costs.
| Aspect | Matte Finish | High-Gloss Finish |
|---|---|---|
| Scuff Mark Visibility | Low – diffuses light, hides scratches | High – reflects every imperfection |
| Winter Salt Damage | Less visible calcium chloride scratches | Shows all salt abrasion clearly |
| Maintenance Frequency | Monthly buffing sufficient | Weekly burnishing required |
| Total Cost (Annual) | $0.45/sq ft (Quebec average) | $0.85/sq ft (Quebec average) |
| Best Application | High-traffic corridors, entrances | Healthcare facilities, showrooms |
| Slip Resistance | Higher traction when wet | Can be slippery, requires additives |
The Humidity Mistake That Ruins Wax Curing on Summer Nights
One of the most overlooked causes of floor finish failure is environmental: specifically, the ambient humidity during application and curing. In Quebec, summer nights can be intensely humid, and applying floor finish under these conditions is a recipe for disaster. Most water-based acrylic finishes are designed to cure properly in a relative humidity (RH) range of 40-60%. When humidity levels climb higher, the curing process, which relies on water evaporation, slows dramatically.
This delayed curing, or hygroscopic curing interference, leads to a host of problems. The finish remains soft and tacky for an extended period, making it highly susceptible to picking up dirt and showing footprints. More importantly, the polymer chains within the finish cannot cross-link correctly in a moisture-saturated environment. This results in a weaker, less durable film that will quickly break down, scuff easily, and turn yellow prematurely. Instead of a hard, protective layer, you get a soft, compromised coating.
The impact of Quebec’s climate is significant; Canadian flooring maintenance standards show that the 70-80% relative humidity common on a Quebec summer night can extend the cure time for a single coat of wax from the standard 4 hours to over 12 hours. For facilities that rely on overnight work, this means traffic may be allowed on the floor before it has even remotely hardened, guaranteeing failure from day one. To combat this, facility managers must make climate control a non-negotiable part of their floor care protocol.
To ensure a proper cure in humid conditions, follow these climate-specific steps:
- Always monitor humidity levels with a digital hygrometer before starting, targeting the 40-60% RH range.
- Run the building’s HVAC systems or commercial dehumidifiers continuously during and for at least 24 hours after application to control moisture in the air.
- Schedule wax application for early morning hours (e.g., 5-7 AM) when humidity is often at its lowest point.
- Increase air circulation with fans (pointing away from the wet floor) to aid evaporation.
- In extreme humidity, allow for significantly longer cure times between coats and before allowing any foot traffic.
How to Strip Wax from Vinyl Without Damaging the Glue Underneath?
Stripping old, yellowed wax is a necessary evil in floor maintenance, but it carries a significant risk, especially in older Quebec school and hospital buildings. The aggressive, high-pH chemicals in floor stripper are designed to dissolve acrylic polymers, but they can also wreak havoc on the water-based adhesives used to glue down vinyl tiles. If the stripper solution is allowed to dwell too long or is applied too liberally, it can seep into the seams between tiles and reactivate the glue.
This leads to tiles loosening, edges curling, and seams lifting—a far more expensive problem to fix than yellowed wax. This process of over-wetting is a common and costly error. The key to safe stripping is speed and control. The goal is to give the stripper just enough time to dissolve the old finish but not enough time to penetrate the seams and compromise the adhesive underneath. This requires a systematic and disciplined approach, not flooding the entire floor at once.
The Canadian Floor Care Association highlights this specific risk in its guidelines for heritage building maintenance, a scenario very similar to many older institutional facilities in Quebec.
The risk of over-wetting in older Quebec buildings is significant – water-based adhesives can fail if stripper solution dwells too long, causing seams to lift and tiles to loosen.
– Canadian Floor Care Association, Best Practices for Heritage Building Floor Maintenance
To strip safely, work in small, manageable sections (e.g., 3×3 feet or 1×1 meter). Apply the stripper solution, allow it to dwell for only the manufacturer-recommended time (often just 3-5 minutes), scrub, and then immediately remove the resulting slurry with a wet-vac or auto-scrubber. This controlled method ensures that no single area remains saturated for an extended period. Using fans to accelerate drying after the floor has been rinsed is also a crucial final step to minimize the glue’s exposure to moisture.
Why Does Wax Buildup Turn Yellow on VCT Floors Over Time?
While a single coat of fresh wax is clear, the gradual buildup of multiple layers is a primary cause of yellowing on traditional VCT floors. This phenomenon is a combination of chemical degradation and dirt embedment. Each new coat of wax traps a microscopic layer of dirt that wasn’t fully removed during the prior cleaning. Over time, this embedded grime accumulates, creating a dingy, yellow cast that cannot be cleaned away because it’s sealed beneath layers of finish.
This process is accelerated by two powerful factors. The first is UV-initiated polymer scission, where ultraviolet light from sunlight or even fluorescent lighting breaks down the polymer chains in the acrylic finish, causing them to yellow. In Quebec, this effect is intensified during winter; research from Canadian facility management studies shows that VCT floors exposed to the intense UV reflection off snow can exhibit up to 40% faster yellowing near windows and entrances.
The second and more aggressive accelerant is chemical contamination, particularly from winter de-icing salt. The calcium chloride tracked into buildings acts as a catalyst, speeding up the chemical breakdown of the wax. When a floor is recoated without first deep-scrubbing and neutralizing these salt residues, the new wax is applied over a chemically reactive surface, guaranteeing rapid yellowing.
Case Study: Quebec School District Maintenance Protocol Success
A major Quebec school district faced chronic VCT yellowing within months of their summer recoating. An investigation revealed that residual calcium chloride from the previous winter was the primary culprit. They instituted a new protocol: a mandatory deep scrub with a pH-neutralizing rinse at the end of winter, *before* any summer recoating. This single change reduced VCT yellowing by 60%, extending the life of their floor finish from a 6-month cycle to over 18 months, a success documented across 45 schools in the Greater Montreal area.
Why Zinc Whiskers from Floor Tiles Are a Silent Killer for Server Motherboards?
For a hospital or school administrator, the integrity of the data center is paramount. While dust is a known enemy, a far more insidious threat can be growing right under your feet: zinc whiskers. These are microscopic, electrically conductive filaments of zinc that can grow from surfaces electroplated with zinc for corrosion resistance. Common sources in a data center include raised floor tiles, ceiling grids, and server racks, particularly lower-quality components that don’t meet modern whisker-free standards.
These whiskers are incredibly small—often thinner than a human hair—but they are highly dangerous. They can break off, become airborne through airflow from cooling systems, and circulate throughout the room. When they land on a server motherboard or power supply, they can bridge the microscopic gaps between electrical conductors, causing a short circuit. These shorts can lead to data corruption, intermittent equipment failure, or even catastrophic meltdowns and fires. Because they are so small, the cause of failure is often misdiagnosed as a random hardware fault.
The danger is not theoretical. According to recent data center contamination studies, there have been documented cases where over 142 power failures in a single facility were attributed to metal particulate contamination, with zinc whiskers being a primary suspect. This makes subfloor cleaning and surface material selection a critical part of data center management, not just a janitorial task.
Case Study: Canadian Brewery Data Center Zinc Whisker Crisis
A major Canadian brewery experienced a series of unexplained and repeated router explosions that jeopardized both their data operations and production lines. A forensic investigation uncovered thousands of zinc whisker strands throughout their server room. The source was traced to low-cost, zinc-electroplated raised floor tiles and ceiling T-bars sourced from offshore suppliers. This incident served as a stark warning for Quebec’s data centers, highlighting their vulnerability when using imported metal components that do not meet strict Canadian building standards for whisker-free certification. The facility was forced to undertake a costly remediation, replacing all zinc-coated surfaces and implementing specialized filtration systems.
Key Takeaways
- The yellowing of vinyl is a chemical issue, not just a cleaning one, often caused by applying acrylic wax to incompatible LVT urethane coatings.
- Quebec’s climate is a major factor: high summer humidity impairs wax curing, and winter salt chemically and physically degrades floor finishes.
- A matte finish is superior for high-traffic areas as it hides scuffs and salt damage better than high-gloss, reducing maintenance costs.
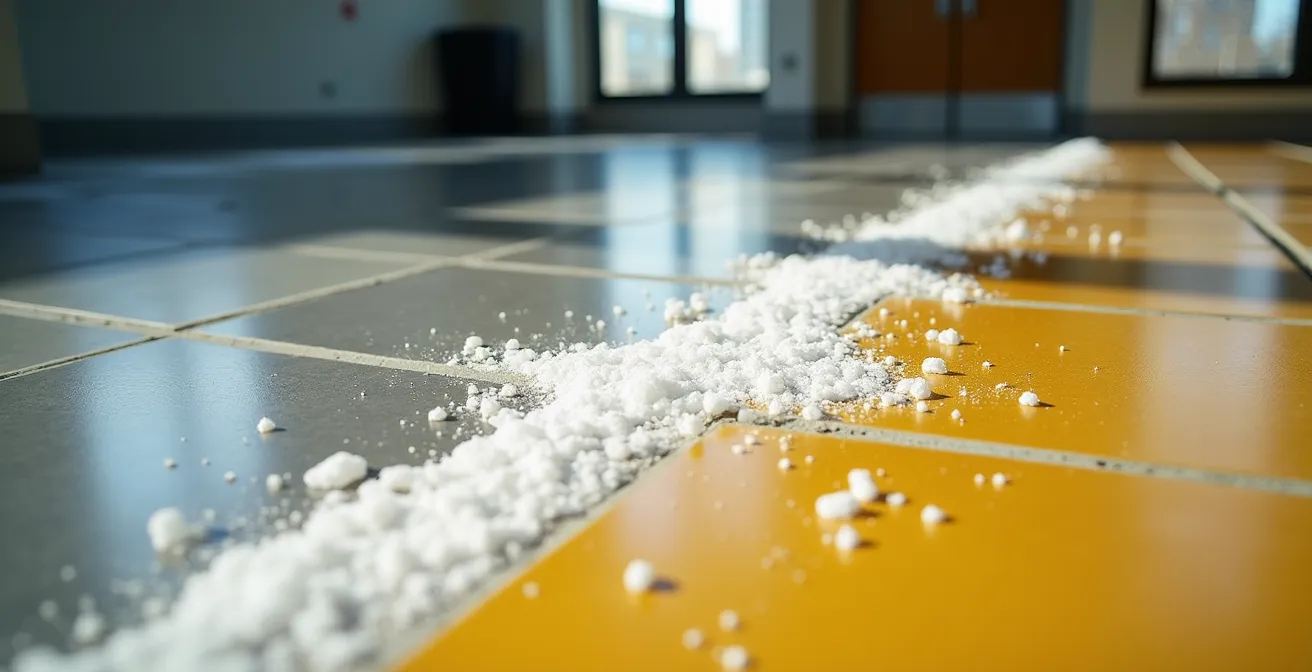
How Does Foot Traffic Turn Salt Grains into Cutting Tools for Wax?
The final, and perhaps most destructive, element in the yellowing and degradation of your facility’s floors is the mechanical damage caused by winter salt. When students, patients, and staff walk into your building, they track in ice-melting compounds like calcium chloride. As the snow and slush melt, the water evaporates, leaving behind microscopic, crystalline salt grains on the floor surface near entrances.
Under the pressure of subsequent foot traffic, these tiny, jagged crystals are ground into the floor finish. They act like sandpaper, creating a dense network of micro-scratches. This process does two things: first, it dulls the finish, destroying the gloss and making the floor look perpetually hazy. Second, and more importantly, it compromises the protective barrier of the wax. These scratches create entry points for dirt, grime, and chemical contaminants to penetrate deep into the finish, where they become embedded and impossible to remove with routine mopping.
The result is a floor that not only looks worn but is also primed for rapid yellowing. The damaged, porous surface traps contaminants that accelerate the chemical breakdown of the wax. To prevent this, the first line of defense is to stop the salt at the door. An effective matting system is not an expense but an investment in protecting the flooring beyond it.
A comprehensive strategy for Quebec facilities involves a layered approach known as the Three-Mat Defense System:
- Mat 1 (Outdoor): An aggressive scraper mat to remove bulk snow, ice, and large salt crystals before they enter the building. This should be at least 6 feet long.
- Mat 2 (Vestibule): A combination scraper/wiper mat to remove finer particles and moisture. This should cover the entire vestibule area, typically 8-10 feet.
- Mat 3 (Indoor): A large wiper mat to capture any remaining moisture and salt residue. This mat should be long enough to ensure several footsteps, at least 15 feet.
Crucially, these mats must be cleaned and maintained rigorously throughout the winter season, and the floor areas immediately surrounding them should be wet-mopped frequently to remove any salt that escapes the system.
To protect your facility’s significant investment, the next step is to audit your current maintenance protocol against these material-specific and climate-aware standards. Begin implementing these strategies today to prevent costly damage and maintain a pristine, professional appearance year-round.