Stop reaching for the vinegar—the secret to saving your hardwood floors from winter salt damage isn’t acidity, but precise pH neutralization.
- Calcium chloride used in Quebec is aggressive and requires a two-step ‘dissolve and neutralize’ approach, not scrubbing.
- Dry removal is non-negotiable: always vacuum thoroughly before any liquid cleaner touches the floor to prevent abrasive scratches.
Recommendation: Adopt a three-zone entryway system (scraper mat, boot tray, absorbent runner) to stop over 70% of salt from ever reaching your wood.
For any Quebec homeowner, it’s a painfully familiar sight. The snow melts off your boots, and as the puddle in the entryway dries, a ghostly white film appears on your beautiful hardwood floors. This crusty, stubborn residue isn’t just regular salt; it’s often a high-performance de-icer like calcium chloride, designed for our harsh winters, and it’s waging a chemical war on your floor’s finish. Your first instinct might be to grab a wet mop or listen to a neighbour’s advice about a simple vinegar solution.
As floor finishing specialists, we see the tragic results of these well-intentioned “hacks” every spring: hazy finishes, permanent scratches, and costly refinishing jobs. The common advice often overlooks the fundamental science at play. The key to safely removing these stubborn mineral deposits isn’t about aggressive scrubbing or using a random household acid. It’s about understanding the unique chemical nature of the salt and using a methodical approach that dissolves the mineral bond without ever abrading the varnish.
This guide moves beyond the myths to provide a professional, science-backed process. We’ll explore why this salt is so damaging, how to create a perfectly balanced cleaning solution, the right techniques to lift residue without scratching, and the preventative measures that will save you headaches next winter. By mastering the principles of pH neutralization and gentle extraction, you can protect your investment and keep your hardwood looking flawless, season after season.
To help you navigate this process effectively, we’ve broken down the essential knowledge and techniques into clear, manageable sections. The following summary outlines the key topics we will cover, guiding you from understanding the problem to implementing a complete floor care strategy.
Summary: A Specialist’s Guide to Winter Floor Care
- Why Does Winter Salt Bond So Aggressively to Natural Wood Fibers?
- How to Create a pH-Balanced Solution to Dissolve Salt Residue Safely?
- White Vinegar for Salt Stains: Is It a Myth or a Safe Solution for Varnish?
- The Scraping Mistake That Turns a Salt Stain into a Permanent Scratch
- How to Protect Wood Floors in Entryways Before the First Snowfall?
- How to Use Chemical Neutralizers Effectively on Carpets Saturated with Calcium?
- The Vinegar Myth: Why This “Natural” Cleaner Ruins Marble and Limestone?
- Why Vacuuming Salt (Dry) Is Better Than Mopping It (Wet) for Scratch Prevention?
Why Does Winter Salt Bond So Aggressively to Natural Wood Fibers?
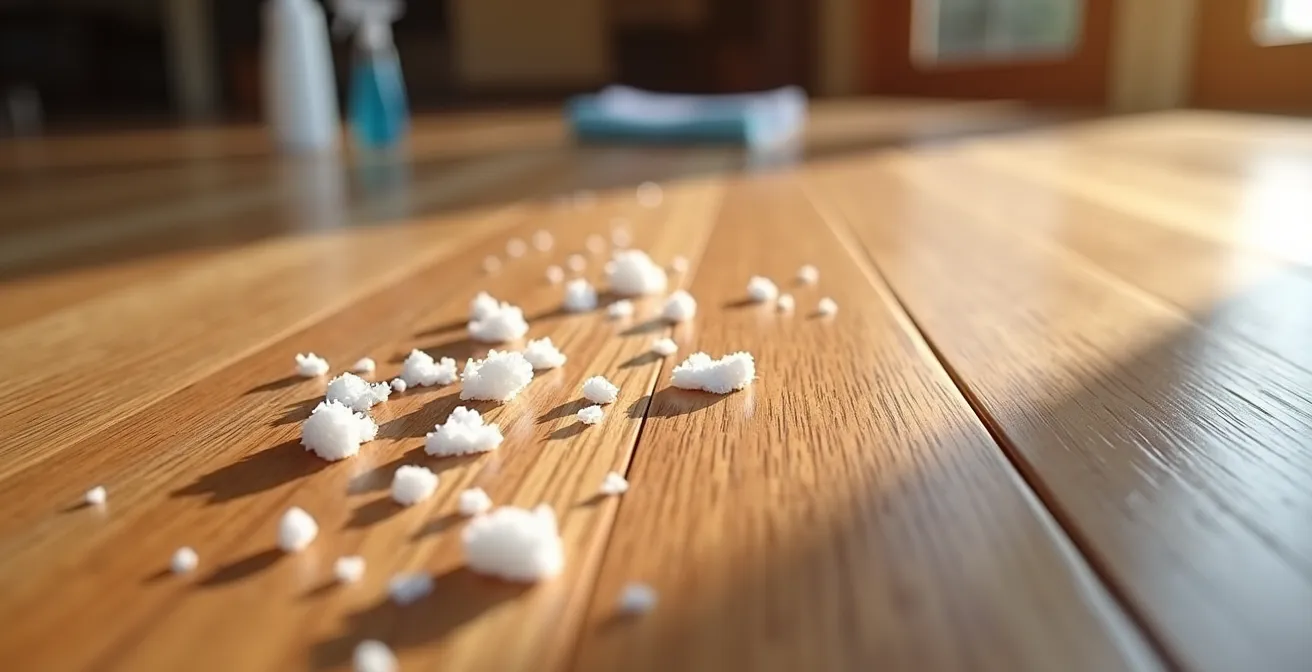
The white, crusty stains plaguing your entryway are more than just dried salt. In a climate like Quebec’s, municipalities and homeowners rely on high-performance de-icers like calcium chloride. Unlike basic rock salt (sodium chloride), calcium chloride remains effective at temperatures lower than -32°C, making it essential for our severe winters. However, its effectiveness comes with a downside: it’s extremely aggressive towards surfaces like hardwood. The primary reason for this is its hygroscopic nature.
Hygroscopic means the substance actively attracts and absorbs moisture from the air. When you track in melted snow containing calcium chloride, the salt doesn’t just sit on the surface. As the water evaporates, the calcium chloride recrystallizes, but in the process, it draws residual moisture from the air and even from the wood fibers themselves. This creates a powerful, crusty hygroscopic bond that latches onto the microscopic pores of your floor’s finish and the wood grain. This isn’t a simple surface stain; it’s a chemical and physical adhesion that is difficult to break without the right approach.
Furthermore, these salt solutions are highly alkaline. This alkalinity chemically conflicts with the typically neutral or slightly acidic nature of polyurethane and other modern floor finishes. Over time, this repeated chemical assault can weaken the finish, leading to hazing, cloudiness, and eventually, a complete breakdown of the protective layer, exposing the vulnerable bare wood underneath. Understanding this aggressive bonding mechanism is the first step toward defeating it.
How to Create a pH-Balanced Solution to Dissolve Salt Residue Safely?
Since the salt residue is alkaline, logic suggests an acid is needed to dissolve it. This is where most DIY advice goes wrong by recommending overly strong or improperly applied acidic solutions. The professional approach is not about overwhelming the salt with acid, but about achieving pH neutralization. Your goal is to use a mildly acidic solution to dissolve the alkaline salt, and then immediately follow up with a neutral rinse to stop any potential acid damage to your varnish. This two-step process is non-negotiable for protecting your floor.
A safe, homemade solution uses highly diluted white vinegar. The ratio is critical: a maximum of one part vinegar to ten parts water. Anything stronger risks damaging the finish. However, a far safer and highly recommended alternative is to use a commercially formulated, pH-neutral hardwood floor cleaner. As floor care specialists, we consistently recommend products from trusted brands. According to Bona Canada, their cleaners are specifically designed to be gentle and effective. As they state on their Canadian website, “Each Bona Floor Cleaner is uniquely formulated to care and protect your floor with it’s gentle, pH neutral formula.” These products, readily available at stores like Canadian Tire and RONA, remove the guesswork and provide a reliable, residue-free clean.
Whether you choose a DIY solution or a commercial product, the application method is key. The cleaning cloth should be barely damp, never wet. You want just enough moisture to dissolve the salt without saturating the wood. After gently wiping the dissolved salt, you must immediately wipe the area again with a separate clean cloth dampened only with water (or a pH-neutral cleaner) to neutralize the surface, and then dry it completely with a microfiber towel.
Your Action Plan: The Two-Step Neutralization Method
- Apply a highly diluted vinegar solution (maximum 1:10 ratio) on a barely damp cloth to dissolve the alkaline salt.
- Immediately follow with a neutralizing rinse using a clean cloth with water or a pH-neutral floor cleaner like Bona.
- Consider using specialized products like Bona Hardwood Floor Cleaner, available at Canadian Tire and RONA, for guaranteed pH safety.
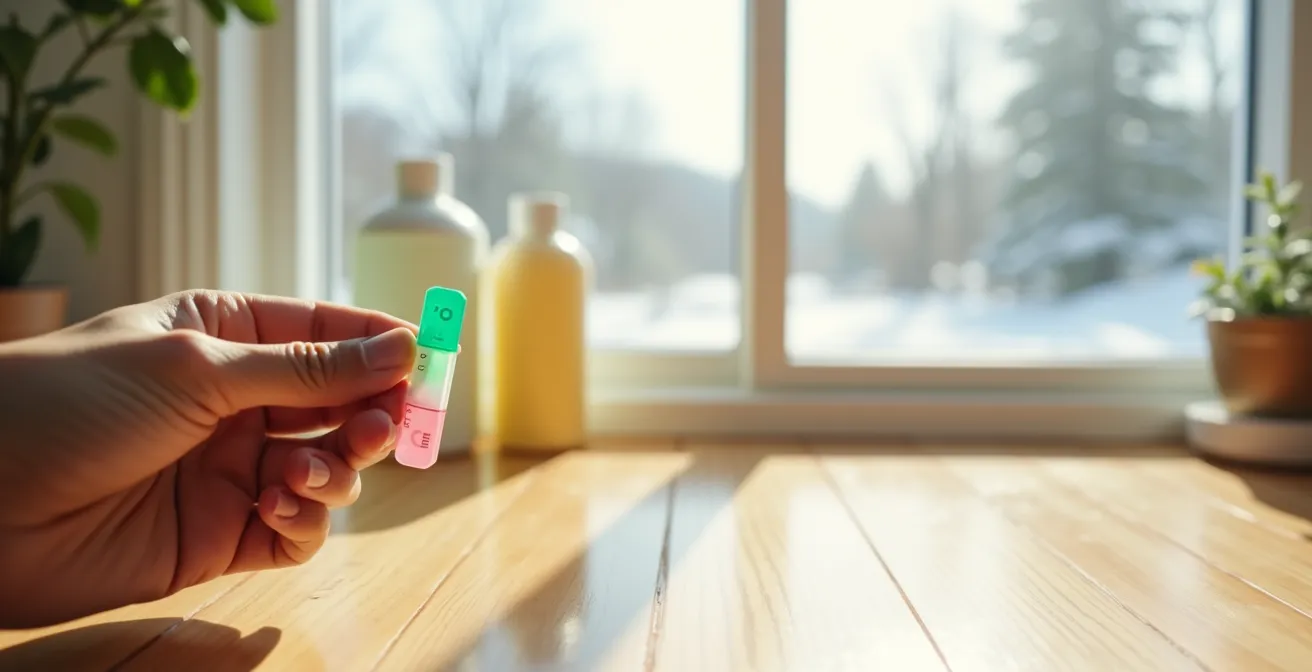
- If using a DIY solution, you can test its safety with litmus paper from pharmacies like Jean Coutu to ensure it’s near a neutral pH.
- Dry the area immediately and thoroughly with a soft microfiber cloth to prevent any moisture from seeping into wood seams.
White Vinegar for Salt Stains: Is It a Myth or a Safe Solution for Varnish?
Vinegar is often hailed as a natural, all-purpose cleaning miracle, but when it comes to hardwood floors, this reputation is dangerous. The idea that a simple vinegar and water mix is a cure-all for salt stains is a significant misconception. As the Nydree Flooring Experts warn, this common advice can be destructive: “Many people are under the impression that a simple application of vinegar mixed with water will get the job done, but this is a big misconception. First, vinegar can actually do more harm than good to the floor. It can strip the finish and leave harmful residue on the flooring.”
The problem lies in vinegar’s acetic acid. While it can dissolve alkaline salt deposits, it doesn’t distinguish between the salt and your floor’s protective finish. Modern floor finishes, especially water-based polyurethanes, are sensitive to acidic compounds. Repeated use of even diluted vinegar can cause microscopic pitting and etching on the surface. At first, you may not notice it, but over a winter season, this cumulative damage manifests as a dull, hazy, or cloudy appearance that no amount of cleaning can remove. The finish itself has been chemically damaged.
The safety of vinegar is entirely dependent on your floor’s finish type and condition. A brand-new, oil-based polyurethane floor might tolerate a highly diluted solution, but a floor with a water-based finish, a delicate wax coating, or any existing scratches is at high risk of permanent damage. When the finish is compromised, the acidic solution can penetrate to the bare wood, causing swelling, discoloration, and long-term structural issues. Given these high stakes, the professional recommendation is to always opt for a pH-neutral cleaner specifically designed for wood floors.
This comparative table illustrates the risks associated with using vinegar on different types of common hardwood finishes.
| Floor Finish Type | Vinegar Tolerance | Risk Level | Recommended Alternative |
|---|---|---|---|
| Modern Oil-Based Polyurethane (Intact) | Cautiously Tolerant (1:10 dilution max) | Low-Medium | pH-neutral cleaner preferred |
| Water-Based Polyurethane | Not Recommended | High (hazing, clouding) | Bona or similar pH-neutral only |
| Waxed Finishes | Never Use | Extreme (permanent damage) | Specialized wax-safe cleaners |
| Shellac/Tung Oil | Never Use | Extreme (dissolution) | Oil-specific maintenance products |
| Worn/Scratched Finish | Never Use | Extreme (bare wood damage) | Professional refinishing needed |
The Scraping Mistake That Turns a Salt Stain into a Permanent Scratch
When faced with a thick, crusty salt deposit, the intuitive reaction is to try and scrape or scrub it off. This is perhaps the most damaging mistake a homeowner can make. You are not just fighting a stain; you are fighting a crystalline mineral. Salt crystals, though small, are hard and sharp. Their abrasive potential is significant, as research into their material properties confirms. With salt crystals rating around 2.5 on the Mohs hardness scale, dragging them across your floor’s finish is equivalent to rubbing it with fine-grit sandpaper. This action creates a network of fine scratches that permanently dulls the surface.
The correct professional method is not abrasion, but controlled dissolution. You must soften and dissolve the crystals in place before you attempt to lift them. This is achieved using the “soft-lift” or compress technique. Instead of scrubbing, you apply a cloth dampened with your pH-balanced cleaning solution directly onto the crusty deposit and let it sit for 5 to 10 minutes. This gives the solution time to work its way into the crystalline structure and break the bond without any mechanical force.
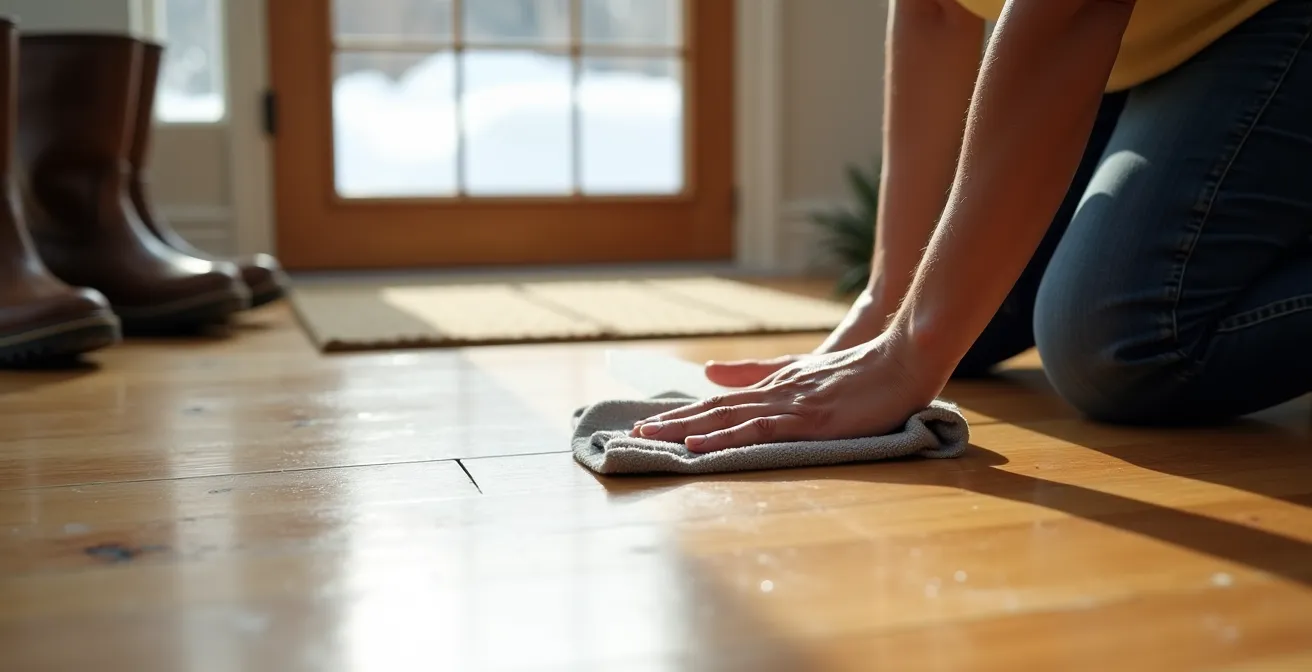
After the deposit has softened into a slurry, the removal must still be gentle. Do not wipe or drag the residue. Instead, use a flexible plastic tool, like an old loyalty card or a plastic putty knife, to gently lift the slush off the surface. Follow this by blotting the area with a clean, absorbent microfiber cloth to pick up any remaining moisture and residue. This “lift and blot” motion, as opposed to a “scrub and wipe,” is the fundamental difference between a professional cleaning and a damaging one. It ensures the abrasive crystals are never dragged across the delicate finish.
How to Protect Wood Floors in Entryways Before the First Snowfall?
The most effective way to deal with salt damage is to prevent it from happening in the first place. A proactive, multi-layered defense system in your entryway is the best investment you can make for the longevity of your hardwood floors. The goal is to create a series of zones that remove, contain, and dry snow and salt before they ever touch the wood. We call this the Quebec-proof three-zone entry system, a non-negotiable for any home with hardwood.
Zone 1: The Scraper. Outside your door, place an aggressive scraper mat with deep grooves or stiff bristles. Its only job is to knock off the heaviest snow, slush, and large salt or gravel particles from the soles of boots. This is your first line of defense.
Zone 2: The Containment. Immediately inside the door, place a waterproof boot tray. The “bac à bottes” is a quintessential Quebec household item for a reason. It contains the melting snow and the concentrated salt solution that drips off footwear, preventing it from ever spilling onto the floor. It’s crucial to empty and clean this tray daily to avoid overflow and to remove the highly corrosive liquid from your home.
Zone 3: The Dryer. After the boot tray, lay down a long, absorbent runner or mat. This final zone is for drying the bottoms of shoes that are now free of heavy slush. It ensures that any remaining dampness is wicked away before someone steps onto the main living area. Combined, these three zones can stop the vast majority of salt from migrating onto your floors. Additionally, a sacrificial layer of floor polish applied only to the high-traffic entryway area before winter can provide a renewable barrier, taking the brunt of any chemical or abrasive damage.
How to Use Chemical Neutralizers Effectively on Carpets Saturated with Calcium?
While hardwood requires a delicate touch, carpets and rugs saturated with winter salt present a different challenge. The porous, absorbent nature of carpet fibers allows the alkaline salt solution to penetrate deeply. Here, the principle of neutralization is still paramount, but the application method can be more robust. As cleaning expert Chris Deziel explains, a standard detergent won’t be effective: “A neutral or alkaline detergent cleaner won’t have much cleaning effect; you need a low-pH cleaner to neutralize the salt deposits.” This means an acidic solution is necessary, but the rules are different than for wood.
For carpeting, a slightly stronger vinegar solution (e.g., one part vinegar to three parts water) is generally safe. The key difference is the ability to saturate and extract. You can spray the solution generously onto the white stains, allowing it to dwell for 10-15 minutes to fully dissolve the deep-set crystals. For tougher jobs, specialized acidic carpet cleaners (often labeled “salt neutralizers”) are available from janitorial supply stores and are highly effective.
The most critical step for carpets is extraction. After the solution has dissolved the salt, you must remove the resulting slurry from the carpet fibers. Simply blotting is not enough. Using a wet-dry vacuum or a carpet cleaning machine to thoroughly extract the liquid is essential. This pulls the salt, dirt, and excess moisture out of the carpet, preventing the salt from simply recrystallizing as it dries. After extraction, a final rinse with clean water, also extracted, will help remove any lingering acidic residue. This robust process is safe for most synthetic carpets but would be catastrophic for hardwood.
The following table clarifies the critical differences between treating salt on carpets versus hardwood floors, highlighting why you can never use the same approach for both.
| Aspect | Carpet Treatment | Hardwood Treatment |
|---|---|---|
| Application Method | Can saturate with solution | Touch-and-go with damp cloth only |
| Solution Concentration | 1:3 vinegar to water acceptable | Maximum 1:10 vinegar to water |
| Dwell Time | 10-15 minutes acceptable | 2-3 minutes maximum |
| Extraction Method | Wet vacuum extraction | Immediate dry cloth blotting |
| Professional Products | Foaming carpet cleaners OK | pH-neutral wood cleaners only |
The Vinegar Myth: Why This “Natural” Cleaner Ruins Marble and Limestone?
To fully appreciate the risk vinegar poses to your hardwood finish, it’s helpful to look at how it affects other sensitive materials, particularly natural stone. Marble, limestone, and travertine are calcium-based stones, making them extremely vulnerable to acids. When vinegar (acetic acid) comes into contact with these surfaces, it triggers an immediate chemical reaction that dissolves the calcium carbonate. This process is called etching, and it leaves a permanent dull, whitish mark that looks like a stain but is actually physical damage to the stone’s surface. It cannot be washed away.
The crucial insight here comes from the Professional Floor Care Association: “Understanding that ‘natural’ doesn’t mean ‘safe for all surfaces’ is the single most important step in avoiding floor damage.” This is the core of the vinegar myth. While vinegar is a natural product, its acidic nature is fundamentally incompatible with acid-sensitive surfaces. The damage that is instant and obvious on marble happens in a slower, more subtle way on a polyurethane floor finish. Repeated exposure to acid creates the same kind of microscopic etching, which accumulates over time to create a permanent haze.
This analogy helps homeowners shift their perspective. Just as you would never clean a marble countertop with vinegar, you should exercise the same caution with your wood floor’s finish. The varnish is a delicate protective layer, not an indestructible shield. By treating it with the same respect as a fine stone surface, you are more likely to use appropriate, pH-neutral products that clean effectively without causing slow, cumulative, and irreversible damage. The goal is to clean the dirt, not to dissolve the finish itself.
Key Takeaways
- Quebec’s winter salt (calcium chloride) is chemically aggressive and requires a specific pH-neutralizing approach, not just generic cleaning.
- Never scrub or scrape dry salt crystals; they act as sandpaper. The correct method is to dissolve them first with a damp cloth, then lift the residue.
- A three-zone entryway system is the most effective way to prevent over 70% of salt damage by stopping salt at the door.
Why Vacuuming Salt (Dry) Is Better Than Mopping It (Wet) for Scratch Prevention?
Before any liquid touches your floor, there is one foundational rule that must be followed without exception: you must remove all dry, loose abrasive particles first. Mopping a floor that still has salt crystals on it is the fastest way to create a slurry of fine-grit sandpaper. As you move the mop head, you are dragging these hard, sharp crystals across the entire surface, inflicting a web of microscopic scratches. This is why mopping wet salt can increase the risk of scratching by as much as 300% compared to a proper dry removal process first.
The professional dry cleaning process is a two-part system. First, use a vacuum with a soft brush attachment on its hose to gently lift any visible salt crystals, pebbles, or other debris. Never use the vacuum’s main beater bar, as the stiff, rotating bristles can also cause scratches and scatter the salt. The goal is gentle lifting, not aggressive agitation. Second, after removing the larger particles, make a pass over the entire area with a dry microfiber dust mop (like a Swiffer Dry) or a dedicated bare-floor vacuum head. This step is crucial for capturing the ultra-fine salt dust that is often invisible but is a primary cause of long-term hazing.
Only after you have thoroughly removed every trace of dry salt should you even consider proceeding with the damp cleaning method described earlier. This “dry-before-wet” protocol is the single most important habit to adopt for preserving your floor’s finish through a long Quebec winter. As reported by professional cleaning services, homeowners who commit to daily vacuuming or sweeping of entryways during winter can reduce permanent floor damage by up to 70%. It’s a simple, quick habit that pays enormous dividends in protecting your valuable hardwood.
By integrating these specialist techniques—from preventative entry mats to the final pH-neutral wipe—you are no longer just cleaning your floors; you are actively preserving them. Now that you have this professional knowledge, you can face the winter with confidence, knowing how to protect your investment. Start by implementing the dry vacuuming technique today and preparing your materials for the next proper cleanup.