
The belief that any soft cloth will protect your modern finishes is a costly myth; true surface care is about matching the tool’s hidden properties to the surface’s specific vulnerabilities.
- Most damage comes from “safe” tools like paper towels and magic erasers, which cause invisible micro-abrasions that dull surfaces over time.
- The science is in the details: microfiber GSM density, sponge abrasiveness, and a cleaner’s pH level are more important than brand names.
Recommendation: Stop guessing and start understanding. Learn the ‘why’ behind the scratches to confidently select tools that preserve, rather than degrade, your home’s beautiful, high-end finishes.
As a design and maintenance consultant, I often see the same look of distress on the faces of new homeowners in Quebec. They’ve invested in a stunning modern kitchen with sleek, high-gloss lacquered cabinets and gleaming stainless steel appliances, only to live in fear of the first inevitable scratch. The common advice is frustratingly vague: “use a soft cloth,” “avoid harsh chemicals.” But this advice fails to address the real source of anxiety: the hidden dangers in everyday cleaning tools that cause microscopic damage, slowly dulling the very shine you’re trying to protect.
The truth is that preventing scratches isn’t about gentleness alone; it’s about understanding the science of surfaces. It’s knowing why a simple paper towel can act like fine sandpaper on lacquer, or how a “magic” sponge can permanently strip the gloss from a finish. This guide moves beyond the platitudes. We will not just tell you what to use; we will explain *why* it works. We’ll delve into the physics of micro-abrasion, the chemistry of pH balance on metals, and the specific challenges faced in Quebec homes, from hard water minerals to winter salt corrosion. By understanding these principles, you will gain the confidence to maintain your modern kitchen flawlessly, transforming fear into expert precision.
This comprehensive guide is structured to build your expertise systematically. We will explore the properties of common cleaning tools, demystify technical specifications, and provide professional techniques to tackle specific challenges without causing harm.
Summary: Master the Art of Flawless Surface Cleaning
- Why Do Paper Towels Leave Micro-Scratches on Lacquered Cabinets?
- How to Use Color-Coded Scrub Sponges (White vs Green) to Avoid Accidents?
- GSM Density: How to Select the Fluffiest Microfiber for Delicate Dusting?
- The Melamine Sponge Mistake: Why You Should Never Use “Magic Erasers” on Glossy Paint?
- How to Use a Plastic Razor Blade to Remove Stickiness Without Scratching Glass?
- Why Does Improper pH Balance Dull the Shine of Brass Fixtures?
- The Chlorine Mistake That Pits and Rusts Stainless Steel Equipment
- How to Restore Clarity to Cloudy Shower Glass Using Professional Techniques?
Why Do Paper Towels Leave Micro-Scratches on Lacquered Cabinets?
The most common cleaning tool in any home is often the first culprit in damaging high-gloss surfaces: the paper towel. While it feels soft to the touch, its structure is deceptive. Paper towels are made from wood pulp, and on a microscopic level, these fibers are coarse and abrasive. When dragged across a delicate, mirror-like lacquered or painted surface, they create thousands of tiny scratches. A single wipe might not be visible to the naked eye, but over time, this repeated micro-abrasion accumulates, scattering light and creating a dull, hazy appearance where a sharp reflection once was.
Think of it as polishing a fine piece of jewelry with a rough work glove. The effect is cumulative and irreversible without professional intervention. This is a fundamental concept of surface care: the tool must be significantly softer than the finish it is cleaning. This is especially true for modern high-gloss finishes, which are essentially a perfectly smooth, clear layer of paint or lacquer. Any disruption to that smoothness degrades the visual quality.
The key to protecting these surfaces is to abandon paper products for cleaning tasks. Instead, opt for materials specifically engineered for gentleness. This initial shift in habit is the single most effective step you can take to preserve the factory finish of your modern cabinets and furniture. Understanding this principle of micro-abrasion is the foundation for all other scratch-free cleaning techniques.
How to Use Color-Coded Scrub Sponges (White vs Green) to Avoid Accidents?
Moving beyond paper towels, the next common point of failure is the sponge. Many homeowners grab the nearest scour pad to tackle a tough spot, unknowingly using a tool designed for heavy-duty scrubbing on a delicate finish. The iconic green scrub pad, for instance, is highly abrasive and will instantly scratch high-gloss paint, stainless steel, and even glass. To prevent these costly accidents, cleaning professionals rely on a simple yet effective system: color-coding for abrasiveness. This system provides an immediate visual cue about a tool’s intended use, eliminating guesswork and protecting surfaces.
Typically, white or blue pads are designated as non-scratch and are safe for the most delicate surfaces like glass, mirrors, and high-gloss finishes. In contrast, green pads are reserved for heavy-duty pot scrubbing and areas where scratching is not a concern. Yellow and red often denote tools for specific zones, like kitchens or high-risk sanitary areas, with varying levels of mild abrasiveness. Adopting a simplified version of this system in your home is a powerful strategy for preventing cross-contamination and, more importantly, surface damage.
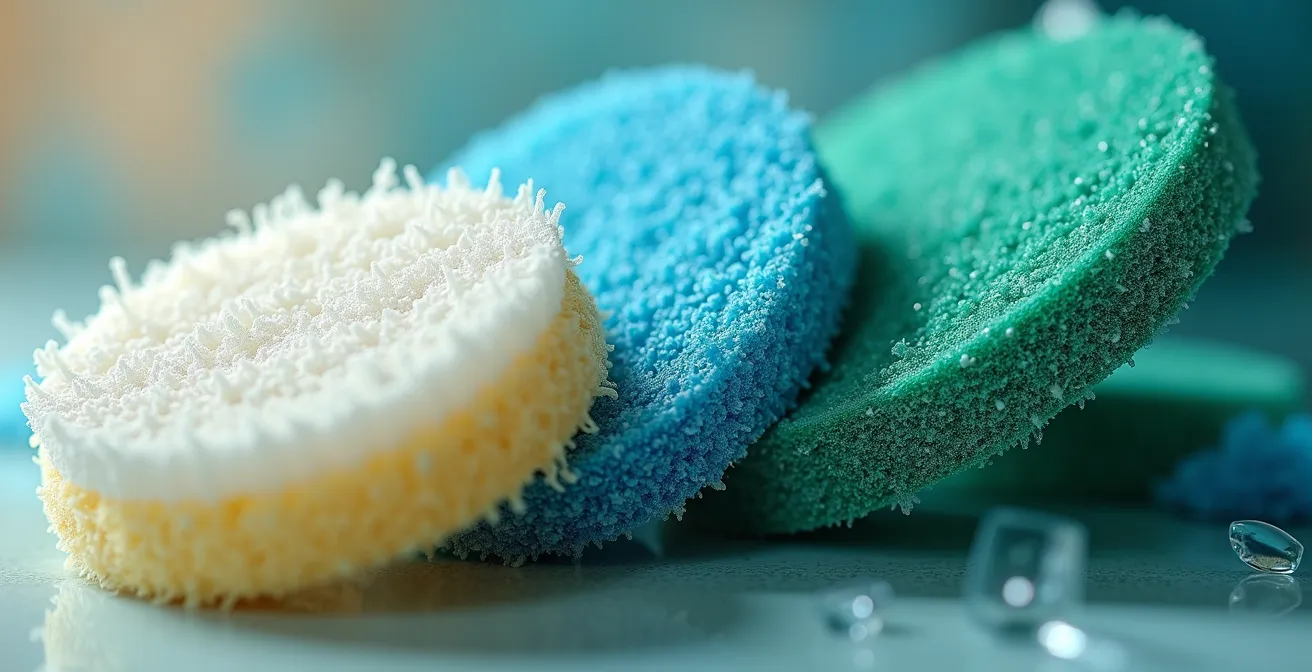
As you can see, the texture varies significantly from one color to the next. By creating a mental or physical separation—keeping abrasive green sponges strictly for pots and pans and using only white non-scratch pads for your appliances and cabinets—you build a safety protocol directly into your cleaning routine. This simple habit protects your investment better than any expensive cleaning product.
The table below breaks down a typical professional color-coding system, providing a clear framework you can adapt for your home to ensure you always grab the right tool for the job.
| Color | Recommended Use | Abrasiveness Level |
|---|---|---|
| White/Blue | Glass, mirrors, delicate surfaces | Non-scratch |
| Green | Heavy-duty cleaning, tough stains | Abrasive |
| Red | High-risk/sanitary areas | Variable |
| Yellow | Kitchen surfaces | Mild |
GSM Density: How to Select the Fluffiest Microfiber for Delicate Dusting?
Once you’ve committed to replacing paper towels, the world of microfiber cloths opens up—and it can be surprisingly complex. Not all microfiber is created equal. The most important factor for determining a cloth’s softness and safety on delicate surfaces is its GSM (Grams per Square Meter). This number measures the cloth’s density or weight, which directly correlates to the length, thickness, and quantity of its fibers. For high-gloss cabinets and sensitive electronics, a higher GSM is almost always better.
A low-GSM cloth (around 200-250) is thin, less absorbent, and has shorter fibers, making it suitable for general-purpose cleaning like wiping down countertops. However, for dusting a black lacquered console or polishing a stainless steel fridge, you need a much plusher tool. Professional detailers recommend that cloths between 350-600 GSM provide superior absorbency and softness for delicate tasks. These high-GSM cloths have a deep, fluffy pile that traps dust particles within the fibers, lifting them away from the surface instead of dragging them across it. This action is critical for preventing the swirl marks and micro-scratches that plague dark, reflective finishes.
However, quality of construction also plays a vital role. As the experts at Jimbo’s Detailing note in their technical guide, a well-made cloth can defy simple metrics. Their team makes a crucial point:
A well-designed 350 GSM towel may outperform a poorly made 600 GSM towel
– Jimbo’s Detailing Technical Team, Microfiber Towel GSM Explained Guide
This highlights the importance of choosing reputable brands and feeling the cloth’s softness and pile. When selecting a microfiber cloth for your most delicate surfaces, look for a high GSM (400+ is a great target), a plush feel, and edgeless or silk-banded edges to further reduce any risk of scratching. This is the science of selecting the right tool for maximum protection.
The Melamine Sponge Mistake: Why You Should Never Use “Magic Erasers” on Glossy Paint?
The “magic eraser,” or melamine sponge, is one of the most misunderstood and misused cleaning tools on the market. Marketed as a miracle solution for tough stains, its effectiveness comes from a highly destructive mechanism. A melamine sponge is not a chemical cleaner; it is a micro-abrasive. On a microscopic level, research shows that melamine foam’s structure is as hard as glass. When wet, it acts like an extremely fine-grit sandpaper—professional cleaners warn it is equivalent to 3000-grit sandpaper. While this makes it effective at physically sanding away stains from durable, matte surfaces, it is catastrophic for high-gloss finishes.
Using a melamine sponge on lacquered cabinets, glossy paint, or even the clear coat of a car will permanently dull the finish. It physically removes a fine layer of the surface, creating a hazy, scuffed patch that cannot be polished away. Professional cleaners report that these sponges can easily strip paint from walls and will remove semi-gloss or gloss finishes if rubbed with even moderate pressure. The damage is not a chemical reaction; it is a physical alteration of the surface integrity.
Beyond surface damage, there is a growing environmental concern. A recent 2024 study found that a shocking 6.5 million microplastic fibers can be released per gram of worn sponge. These tiny fibers wash down the drain and contribute to plastic pollution in our waterways. For the sake of both your expensive finishes and the environment, it is critical to reserve melamine sponges for only the toughest, most durable, non-glossy surfaces, and to recognize them for what they are: a finishing abrasive, not a gentle sponge.
How to Use a Plastic Razor Blade to Remove Stickiness Without Scratching Glass?
Sometimes, even the best cleaning techniques are no match for stubborn, sticky residues like label adhesive, dried-on food, or sap on a window. The instinct might be to reach for a metal razor blade, but this is an extremely high-risk choice that can easily and permanently scratch glass and other hard surfaces. The professional’s alternative is a simple, inexpensive, and remarkably effective tool: the plastic razor blade. Made from durable polycarbonate or acrylic, these blades are hard enough to shear off sticky residues but soft enough that they won’t scratch glass, ceramic cooktops, or even painted surfaces when used correctly.
The technique is just as important as the tool itself. The key is lubrication and angle. Never use a scraper on a dry surface. First, apply a cleaning solution, a dedicated adhesive remover, or even just warm, soapy water to the residue and let it sit for a few minutes to soften. This does most of the work for you. Then, hold the plastic blade at a low 30-45 degree angle to the surface. Use smooth, steady strokes with gentle, consistent pressure, moving in one direction. It is vital to clean the edge of the blade frequently, as a trapped piece of hard debris is what could potentially cause a scratch.
This method allows you to apply focused mechanical force without the risk associated with metal. It’s a perfect example of a professional technique that replaces brute force with finesse. A small pack of plastic razor blades is an essential, low-cost addition to any cleaning kit for a modern home, providing a safe solution for some of the most frustrating cleaning challenges.
Action Plan: Safe Plastic Scraper Usage
- Apply cleaning solution or adhesive remover to soften the residue for 5 minutes.
- Hold the plastic scraper at a 30-45 degree angle to the surface.
- Use gentle, consistent pressure moving in one direction.
- Clean the scraper edge frequently to prevent debris buildup.
- Follow up with a microfiber cloth to remove any remaining residue.
Why Does Improper pH Balance Dull the Shine of Brass Fixtures?
Protecting modern surfaces goes beyond preventing physical scratches; it also involves understanding chemical reactions. Brass fixtures, a popular choice in many contemporary Quebec kitchens and bathrooms, are particularly susceptible to damage from improper cleaner pH. The temptation, especially in regions with hard water, is to use acidic cleaners like vinegar or harsh commercial descalers to remove mineral buildup. This is a critical mistake. Brass is an alloy, primarily made of copper and zinc, and strong acids can trigger a process called dezincification.
During dezincification, the acid selectively attacks and leaches the zinc out of the alloy. This leaves behind a porous, weakened copper surface that appears dull, discolored, and pinkish. The original luster is gone, and the fixture’s structural integrity is compromised. Conversely, highly alkaline cleaners (like oven cleaners or ammonia-based products) can also tarnish and discolor brass. The safe zone for cleaning brass and many other metals is a neutral pH, typically between 6.5 and 7.5. A simple, pH-neutral soap and water solution is often the best choice for routine cleaning.
This is a frequent issue for homeowners in parts of Quebec with very hard water. The visible alkaline mineral deposits (limescale) prompt the use of aggressive acidic cleaners, inadvertently causing permanent damage to expensive fixtures. The professional approach is a two-step process: first, use a pH-neutral cleaner for general dirt, and only if necessary, use a dedicated, mildly acidic brass cleaner specifically formulated to remove tarnish without aggressively attacking the alloy. Always rinse thoroughly with clean water to neutralize any remaining chemical residue.
The Chlorine Mistake That Pits and Rusts Stainless Steel Equipment
Stainless steel is renowned for its durability and resistance to rust, but it is not invincible. Its “stainless” property comes from a very thin, invisible, and protective layer of chromium oxide on its surface. This passive layer shields the iron in the steel from oxygen and moisture. However, certain chemicals can violently break down this protective barrier, with the most common household culprit being chlorine bleach. When chlorine-based cleaners come into contact with stainless steel, they initiate a process called pitting corrosion.
Chloride ions are extremely effective at locally destroying the chromium oxide layer. This exposes the raw steel underneath to the environment, allowing a tiny, deep pit or hole to form. It’s not a uniform surface rust; it’s a localized and insidious form of decay that can be difficult or impossible to repair. A single splash of bleach-based cleaner that isn’t immediately and thoroughly rinsed off can be enough to start the process. This is why you must never use chlorine bleach or cleaners containing it on your stainless steel appliances, sinks, or countertops.
In Quebec, this problem is amplified during the winter. De-icing salt, often containing calcium chloride, can be tracked indoors on boots. If this salty slush melts onto the base of a stainless steel refrigerator or dishwasher, the chloride ions will attack the finish just as aggressively as bleach. This is why professional cleaners in cold climates recommend immediate cleaning of any salt residue on appliances with a pH-neutral cleaner and a thorough rinse. Protecting your stainless steel is less about scrubbing and more about shielding it from its chemical nemesis: chlorides.
Key Takeaways
- The wrong tool is the enemy: Seemingly harmless items like paper towels and “magic” sponges are micro-abrasives that cause cumulative, irreversible damage to glossy surfaces.
- Science over strength: A tool’s effectiveness and safety are determined by its physical and chemical properties (GSM, pH, material hardness), not by marketing claims.
- Context is crucial: Local conditions, like Quebec’s hard water and road salt, introduce specific chemical threats that require targeted, knowledgeable cleaning strategies.
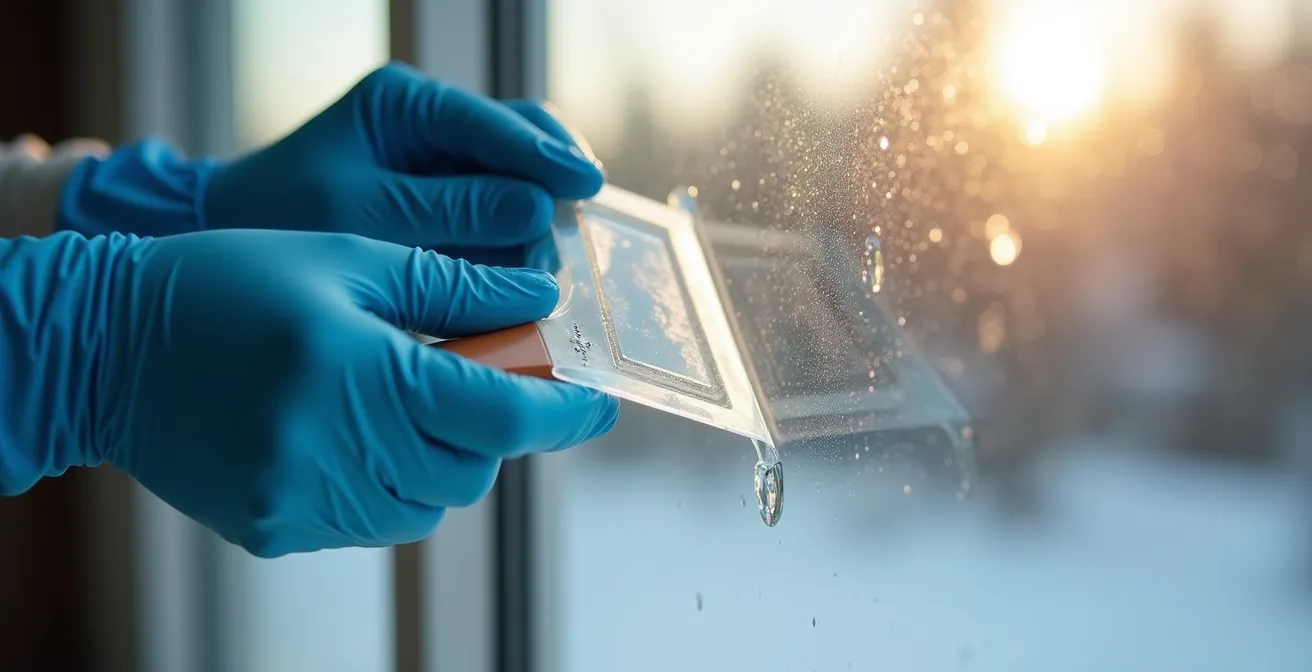
How to Restore Clarity to Cloudy Shower Glass Using Professional Techniques?
Cloudy shower glass is a common frustration, obscuring a bathroom’s clean, modern aesthetic. The cloudiness is typically caused by one of two things: removable hard water deposits (limescale) or permanent etching of the glass itself. Before attempting any restoration, you must diagnose the problem. Run your fingernail over the cloudy area. If you can feel a rough, chalky deposit, it’s likely removable limescale. If the glass feels smooth but still appears cloudy, you are likely dealing with permanent etching, where the minerals have chemically bonded with and damaged the glass surface over time.
For removable limescale, a professional approach using a mild acid is effective. Create a 1:1 solution of white vinegar and water and apply it to the glass, letting it sit for about 10 minutes to dissolve the mineral bonds. For stubborn spots, the secret weapon is #0000 ultra-fine steel wool. This specific grade is softer than glass and will not scratch it when used correctly with a lubricant (like your vinegar solution or soap and water). Use gentle, circular motions with minimal pressure. This combination mechanically removes the deposits without harming the glass underneath.
After treatment, rinse the glass thoroughly and dry it completely. A squeegee is the best tool for a streak-free finish, followed by a final buff with a high-quality, 300-350 GSM microfiber cloth. If your diagnosis revealed permanent etching, the options are more limited. A cerium oxide polishing kit can sometimes reduce the appearance of mild etching, but this is an advanced technique. In most cases of severe etching, replacement is the only true solution, which underscores the importance of regular cleaning to prevent the buildup in the first place.
Your Checklist: Professional Glass Restoration Process
- Identify if cloudiness is removable deposits or permanent etching using the fingernail test.
- For limescale, apply diluted vinegar solution (1:1 with water) for 10 minutes.
- Use #0000 ultra-fine steel wool in circular motions with minimal pressure.
- Rinse thoroughly and dry with a 300-350 GSM microfiber for a streak-free finish.
- For etching, consider a cerium oxide polishing kit as a last resort before replacement.
Frequently Asked Questions about Cleaning and Surface Care
What pH range is safe for brass fixtures?
To prevent dezincification or alkaline tarnishing, you should always aim to use cleaners that have a neutral pH, which is between 6.5 and 7.5. This is the safest range for routine cleaning of brass.
Can I use vinegar on brass to remove hard water stains?
You should avoid using straight, undiluted vinegar. Its high acidity (around pH 2.5) can be aggressive and damage the brass alloy. If you must use it, ensure it is highly diluted and applied only for a very brief period before being thoroughly rinsed. However, opting for a dedicated, pH-neutral cleaner is always the safer choice.
How often should brass fixtures be polished?
The frequency depends on use and environment. For high-use areas like a kitchen sink, a monthly polish is recommended. For more decorative pieces, polishing every three to four months is sufficient. Always use specialized brass polishing products available in Canada to ensure compatibility and preserve the finish.