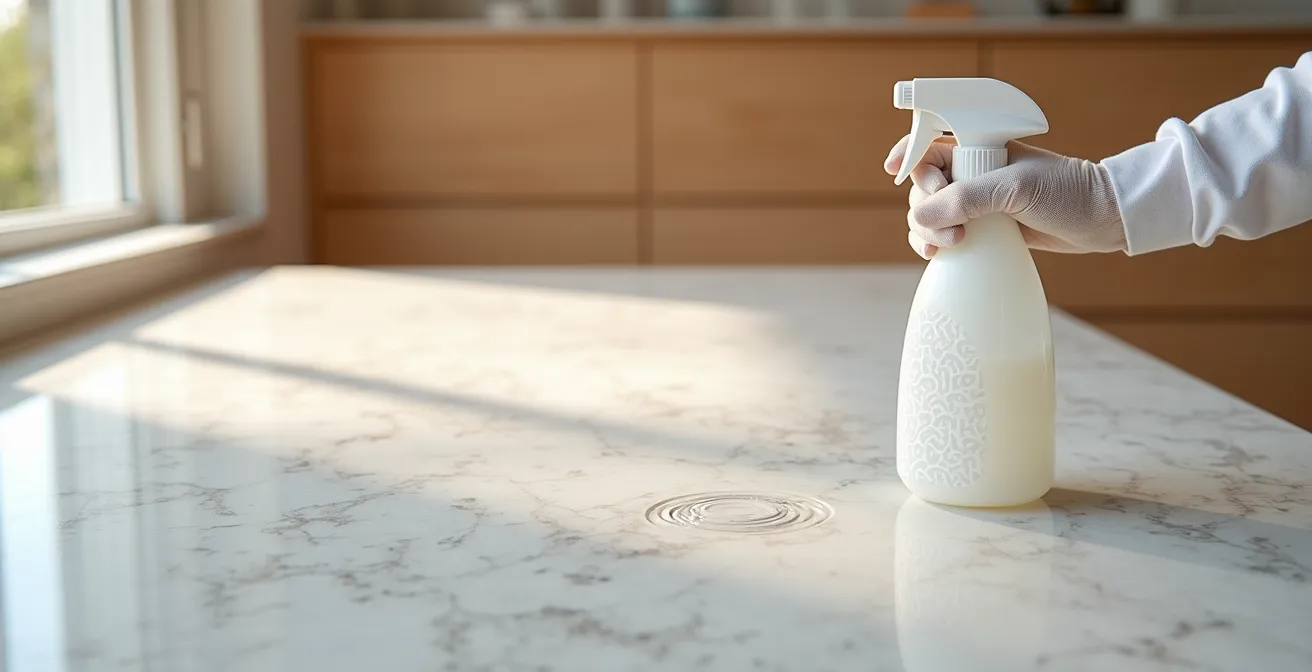
Using the wrong cleaner is not just “less effective”—it’s an act of molecular sabotage on your expensive stone and wood surfaces.
- Acidic cleaners (like vinegar) chemically etch calcium-based stones like marble and travertine on contact.
- Alkaline degreasers strip the protective sealants from granite, leaving it vulnerable to stains and dulling.
Recommendation: Always use a tested, pH-neutral (pH 7) cleaner and master the proper rinsing technique to protect your investment long-term.
As a homeowner in Quebec, you’ve invested significantly in the beauty of natural materials. The elegant veins of a granite countertop, the warm glow of a maple hardwood floor, the classic appeal of a limestone facade—these are not just functional surfaces, but core elements of your home’s character. The common belief is that “stronger” cleaners are better, a philosophy that leads many to grab an all-purpose degreaser or a “natural” vinegar solution. We believe we are fighting grime, but we are often unknowingly waging a chemical war against our own investments.
The advice to simply “use a gentle cleaner” is everywhere, but it lacks the crucial context. It doesn’t explain the silent, cumulative damage occurring at a molecular level. This isn’t just about cleaning; it’s about preservation. The true key to longevity for your high-end surfaces doesn’t lie in aggressive scrubbing or powerful chemicals, but in understanding the simple, elegant science of pH neutrality. It’s about shifting your mindset from a simple cleaner to a knowledgeable surface conservator.
This guide moves beyond generic advice. We will delve into the chemistry of how alkaline and acidic cleaners cause molecular sabotage on specific materials found in Quebec homes. We will explore how modern, pH-neutral formulas can be surprisingly effective against grease, debunk the persistent myths surrounding vinegar, and provide the practical knowledge you need to protect the value and beauty of your natural stone and wood for decades to come.
To navigate this essential topic, this article breaks down the science and provides actionable strategies. Explore the sections below to understand the specific risks and solutions for your valuable surfaces.
Summary: The Chemist’s Guide to pH-Neutral Cleaners
- Why Do Alkaline Cleaners Slowly Dissolve the Sealant on Granite Countertops?
- How to Test the pH Level of Your Cleaning Products at Home for Under $10?
- pH-Neutral vs Heavy Duty Degreasers: Can Gentle Cleaners Actually Remove Kitchen Grease?
- The Vinegar Myth: Why This “Natural” Cleaner Ruins Marble and Limestone?
- How to Rinse pH-Neutral Cleaners to Avoid Hazy Residue on Shiny Floors?
- White Vinegar for Salt Stains: Is It a Myth or a Safe Solution for Varnish?
- The Acidic Cleaner Error That Can Ruin Travertine Flooring in Seconds
- Restoring vs Replacing: Which Option Saves Property Managers More Money over 5 Years?
Why Do Alkaline Cleaners Slowly Dissolve the Sealant on Granite Countertops?
Granite’s reputation for durability is well-deserved, but its primary defense against stains is not the stone itself, but the thin, invisible layer of sealant applied to its surface. This sealant, typically an acrylic or polyurethane-based polymer, fills the stone’s microscopic pores. Alkaline cleaners, with a pH level typically above 8, wage a slow but relentless chemical war on this protective barrier. The high pH works by breaking down fatty acids (grease and oils), but it doesn’t distinguish between kitchen grime and the organic polymers in your sealant.
Over time, this repeated molecular sabotage weakens and erodes the sealant. A recent granite care analysis reveals that this breakdown is the leading cause of granite becoming susceptible to staining and losing its lustre. You might first notice that water no longer beads on the surface, or that certain areas, especially around the sink or stove, appear duller than the rest. This isn’t the stone failing; it’s the sealant that has been chemically compromised. Once the sealant is gone, the porous granite underneath is exposed, ready to absorb oils, wine, or coffee, leading to deep stains that are difficult or impossible to remove without professional intervention.
This process is insidious because it’s gradual. You won’t see damage after one use. But with each cleaning using an alkaline product, you are stripping away a microscopic layer of protection. Eventually, this cumulative damage leads to a dull, vulnerable surface that requires costly professional resealing to restore its protective qualities and original shine. The very tool used to “clean” becomes the agent of its decline.
How to Test the pH Level of Your Cleaning Products at Home for Under $10?
Becoming a true surface conservator for your home means moving from assumption to certainty. Instead of trusting a label that says “safe for stone,” you can easily verify the pH of your cleaners yourself. This simple test is the single most empowering step you can take to prevent accidental damage. All you need are pH test strips, a small investment that can save you thousands in restoration costs. These strips are readily available in Quebec and provide instant, clear results.
You can easily find pH test strips designed for pool and spa maintenance at stores like Canadian Tire; these are perfectly suitable for testing household cleaners. Pharmacies like Jean Coutu or even larger grocery stores like Metro often carry them in their health or first-aid sections. Look for a kit with a broad range, ideally from pH 0 to 14, to accurately measure both acidic and alkaline products. The process is simple: dip a strip into a small sample of your cleaning solution for a couple of seconds, remove it, and immediately compare the resulting color to the chart provided. Your target is a color that indicates a pH of 7, the neutral point. This is often a shade of green or yellow-green.
This paragraph introduces the visual aspect of pH testing. The image below shows what a typical pH test strip chart looks like, with the safe, neutral zone clearly highlighted.
As you can see, the colour change is dramatic. An acidic cleaner like vinegar will turn the strip bright red or orange, while a strong alkaline degreaser will shift it to a deep blue or purple. It’s also a wise idea to test your tap water first, as water hardness can slightly influence the final pH of a diluted solution. Montreal, for instance, is known for its moderately hard water, which is slightly alkaline and can impact the cleaning process.
pH-Neutral vs Heavy Duty Degreasers: Can Gentle Cleaners Actually Remove Kitchen Grease?
A common and understandable skepticism surrounds pH-neutral cleaners: if they are so “gentle,” how can they possibly cut through tough kitchen grease? The answer lies in a more sophisticated approach to cleaning chemistry. Heavy-duty alkaline degreasers use a brute-force method called saponification. This is the same basic chemical reaction used to make soap for millennia, where a strong alkali reacts with fat to convert it into a water-soluble soap. It’s effective but indiscriminately attacks both grease and the organic sealants on your countertops.
Modern pH-neutral cleaners, however, employ a more elegant mechanism centered on molecules called surfactants. A surfactant molecule has a unique structure: one end is hydrophilic (attracted to water), and the other is lipophilic (attracted to oil and grease). When introduced to a greasy surface, these surfactants surround the tiny droplets of oil, forming a microscopic sphere called a micelle. The oil-loving tails point inwards, grabbing the grease, while the water-loving heads face outwards. This process, known as micelle encapsulation, effectively traps the grease, allowing it to be lifted from the surface and wiped away cleanly with water, all without the need for a corrosive high-pH environment.
This table clearly breaks down the difference in how these two types of cleaners operate, highlighting the safety and effectiveness of modern pH-neutral formulas.
| Cleaner Type | pH Level | Grease Removal Method | Surface Safety | Dwell Time Needed |
|---|---|---|---|---|
| pH-Neutral (Modern Surfactants) | 7.0 | Micelle encapsulation | Safe for all sealants | 30-60 seconds |
| Alkaline Heavy-Duty | 11-13 | Saponification | Degrades sealants | Immediate |
So, while it may take a slightly longer dwell time—letting the cleaner sit for 30 to 60 seconds to allow the micelles to form—a quality pH-neutral cleaner is more than capable of handling everyday kitchen grease. It achieves the same result as a harsh degreaser but does so with surgical precision, removing the grime without causing collateral damage to your valuable surfaces. It’s the difference between using a sledgehammer and using a key.
The Vinegar Myth: Why This “Natural” Cleaner Ruins Marble and Limestone?
Vinegar is often touted as a miracle “natural” cleaner, a safe and eco-friendly alternative to commercial products. While it is an excellent disinfectant and can be useful on certain non-porous surfaces like glass, this popular belief becomes dangerous when applied to calcium-based stones. Materials like marble, limestone, and travertine are fundamentally composed of calcium carbonate, a mineral that is highly reactive to acids.
The core of the problem lies in vinegar’s aggressive acidity. With a pH level between 2 and 3, it is a potent acid. When vinegar comes into contact with the calcium carbonate in marble or limestone, a chemical reaction occurs instantly. The acid dissolves the stone, physically destroying the mineral crystals on the surface. This damage is not a stain; it is an etch. An etch mark appears as a dull, whitish, or rough spot where the stone’s polish has been literally eaten away. This is irreversible damage that cannot be wiped or scrubbed off; it requires professional honing and repolishing to repair.
This vulnerability is particularly relevant in Quebec, where historic buildings and even modern constructions feature beautiful Saint-Marc limestone. As noted in analyses of stone care, any stone containing calcium carbonate is acutely sensitive to acid. Using a vinegar and water solution to clean a marble bathroom vanity or a limestone floor is the chemical equivalent of sanding it with a fine-grit abrasive. The damage may seem subtle at first, but with each application, the surface becomes progressively more pitted and dull, destroying the natural beauty you invested in. The “natural” label gives a false sense of security, masking the potent chemical reality.
How to Rinse pH-Neutral Cleaners to Avoid Hazy Residue on Shiny Floors?
You’ve done your due diligence: you’ve selected a high-quality, pH-neutral cleaner for your glossy hardwood or polished porcelain floors. Yet, after mopping, you’re left with a frustrating, hazy film that dulls the shine. The culprit is rarely the cleaner itself, but rather an improper rinsing technique. When you mop, you are lifting dirt and grime into the cleaning solution. If you repeatedly dip a dirty mop back into the same bucket, you are essentially spreading a thin layer of dirty water across the floor. As this water evaporates, it leaves behind a residue of dirt and cleaner, resulting in that dreaded haze.
The professional solution is simple and highly effective: the two-bucket method. This technique ensures you are always rinsing with clean water, physically removing the dirt from your home instead of just moving it around. This is especially crucial in areas with hard water, like much of Quebec, where mineral deposits from evaporating tap water can contribute significantly to the hazy residue. For a truly flawless finish on very dark or high-gloss floors, a final pass with a microfiber cloth dampened with distilled water can make all the difference, as it contains no minerals to leave behind.
The following illustration depicts the core principle of the two-bucket system, separating the cleaning solution from the rinse water for a residue-free result.

Drying the floor immediately after rinsing is the final critical step. Using a clean, dry microfiber mop head prevents water from sitting and evaporating, which is the primary cause of mineral spots and streaks. This systematic approach—clean, rinse, dry—is the secret to achieving and maintaining a brilliant, streak-free shine.
Action Plan: The Two-Bucket Method for Residue-Free Floors
- Fill the first bucket with your pH-neutral cleaner solution, following the manufacturer’s dilution ratio.
- Fill the second bucket with clean, warm water. This is your rinse bucket.
- Mop a small section of the floor (e.g., 4×4 feet) with the cleaning solution.
- Before putting the mop back in the cleaning solution, rinse it thoroughly in the clean water bucket, wringing it out completely.
- For high-gloss floors in hard water areas like Quebec, consider a final pass with a separate microfiber cloth lightly dampened with distilled water.
- Dry the section immediately with a clean, dry microfiber mop pad to prevent water spots and mineral deposits.
White Vinegar for Salt Stains: Is It a Myth or a Safe Solution for Varnish?
The harsh Quebec winter brings a relentless assault of road salt into our homes. Those white, chalky stains on your beautiful maple or birch hardwood floors are not just unsightly; they are a sign of a chemical attack. A common piece of folk wisdom suggests fighting these salt stains with a solution of white vinegar. This is a dangerous myth that can cause far more harm than good. The white residue you see is primarily alkaline salt deposits, often calcium chloride, which is more aggressive than simple table salt.
While it is chemically true that an acid (vinegar) will neutralize an alkali (salt residue), applying it directly to a varnished wood floor is a critical mistake. As cleaning expert Ahmed Mezil of Hellamaid, a Canadian cleaning service, notes, ” Vinegar is acidic with a pH around 2.5. While natural, vinegar can damage… hardwood finishes… over time.” The acid in the vinegar doesn’t just dissolve the salt; it also begins to etch and break down the polyurethane or acrylic varnish protecting your wood. You might remove the white stain, but you do so at the cost of dulling and weakening the floor’s protective finish, making it more susceptible to scratches and water damage in the future.
This is a classic case of the “cure” being worse than the disease. Property service experts in Ontario and Quebec regularly deal with the fallout from this exact issue, where homeowners have compounded the aggressive damage from calcium chloride road salt by using acidic cleaners. A far safer and more effective method is to use a mop dampened with warm, clean water and a pH-neutral cleaner. The neutral formula will gently lift the salt residue without compromising the integrity of the varnish. For stubborn stains, patience and a second pass are infinitely better than resorting to the molecular sabotage of an acidic solution.
The Acidic Cleaner Error That Can Ruin Travertine Flooring in Seconds
Travertine, with its warm, earthy tones and unique porous texture, is a popular choice for high-end bathrooms and entryways, especially in modern condos in areas like Griffintown. However, its beauty is matched by its extreme chemical sensitivity. Like its cousins marble and limestone, travertine is a calcium carbonate stone. The difference is its highly porous structure, which acts like a sponge, drawing liquids deep into the stone almost instantly. This makes it uniquely vulnerable to acidic substances.
An acidic cleaner—or even a spilled glass of wine or lemon water—doesn’t just sit on the surface of travertine. It is wicked into the stone’s pores, causing widespread damage in a fraction of the time it would take on denser marble. In fact, stone care experts confirm that etching occurs within seconds of acid making contact with travertine. This isn’t a gradual wear-and-tear; it’s an immediate and catastrophic chemical burn that leaves a permanent dull spot. A single cleaning mistake with the wrong product can instantly ruin a tile, requiring costly professional intervention.
It’s crucial to understand the difference between a stain and an etch. A stain is a discoloration caused by a substance soaking into the stone, which can sometimes be poulticed out. An etch is physical corrosion; the acid has eaten away the surface of the stone itself. This damage is rough to the touch and cannot be cleaned away. Repairing an etch on travertine requires a professional to physically grind down (hone) and re-polish the surface. Given that professional restoration in Quebec can cost anywhere from $3 to $8 per square foot, a simple cleaning error can quickly escalate into a multi-thousand-dollar repair bill. For travertine, strict adherence to pH-neutral cleaners is not just a best practice—it’s essential insurance against immediate and costly damage.
Key Takeaways
- Alkaline (high pH) and acidic (low pH) cleaners cause irreversible chemical damage to sealed granite, wood varnish, and calcium-based stones like marble and travertine.
- Modern pH-neutral (pH 7) cleaners use sophisticated surfactants (micelles) to effectively remove grease without harming surfaces.
- Always test cleaner pH with test strips and use the two-bucket method with clean water for a residue-free rinse, especially in areas with hard water.
Restoring vs Replacing: Which Option Saves Property Managers More Money over 5 Years?
For property managers overseeing multiple units in a city like Montreal, the choice of cleaning products is not just a matter of hygiene—it’s a significant financial decision. The allure of cheaper, seemingly “stronger” alkaline or acidic cleaners is a false economy. While the upfront cost per bottle is lower, the long-term financial fallout from the resulting surface damage is staggering. This damage manifests as increased maintenance calls, tenant complaints about dull surfaces, and ultimately, the high cost of professional restoration or even premature replacement of countertops and flooring.
Implementing a strict protocol using only pH-neutral cleaners represents a strategic investment in asset preservation. It requires a slightly higher initial outlay for quality products and, crucially, for staff training to ensure proper use and rinsing techniques. However, this upfront cost is dwarfed by the savings realized by avoiding damage. There are no surprise bills for refinishing hardwood floors stripped by improper salt removal, no emergency calls to hone etched marble vanities, and no need to prematurely reseal entire buildings’ worth of granite countertops. As experts at MSI Surfaces state, ” Sealing your granite countertops is a crucial step in protecting your investment,” and using the right cleaner is the key to preserving that seal.
The following 5-year cost analysis for a hypothetical 100-unit Montreal property clearly illustrates the dramatic financial difference between the two approaches. The scenario using cheaper, improper cleaners results in costs more than five times higher than the preventative, pH-neutral strategy.
| Cost Category | Scenario A: pH-Neutral Cleaners | Scenario B: Alkaline/Acidic Cleaners |
|---|---|---|
| Annual Cleaning Products | $2,400 ($20/unit) | $1,200 ($10/unit) |
| Staff Training (Year 1) | $1,500 | $0 |
| Annual Stone Restoration (5% of units) | $0 | $7,500 |
| Hardwood Refinishing (2% of units) | $0 | $4,000 |
| Tenant Turnover Costs (due to damage) | $0 | $3,000 |
| 5-Year Total | $13,500 | $69,700 |
The numbers are unequivocal. The small savings on cleaning supplies are obliterated by tens of thousands of dollars in restoration and replacement costs. For any property owner or manager, the conclusion is clear: standardizing on pH-neutral cleaners is one of the most effective cost-saving measures available, directly protecting the long-term value of the property.
To fully protect your investment, the next logical step is to audit your current cleaning supplies and practices against these chemical principles. Begin today by implementing a pH-neutral cleaning protocol to ensure the longevity and beauty of your valuable surfaces.
Frequently Asked Questions about Cleaning Natural Stone
What’s the difference between a stain and an etch on travertine?
A stain is discoloration that soaks into the stone and may be removable with a poultice. An etch is physical corrosion of the surface itself, caused by acid. It appears as a dull and rough spot, requiring professional honing and polishing to repair.
Can wine or lemon water damage travertine instantly?
Yes. Because travertine is highly porous, acidic liquids can be wicked into the stone and cause noticeable etching within seconds, long before you might have time to wipe them up. This is a common issue in high-traffic areas like the bathrooms of modern Griffintown condos.
What’s the cost of professional travertine restoration in Quebec?
The cost for professional restoration, which includes honing the surface to remove the etch and re-polishing it, can range from $3 to $8 per square foot. This makes prevention with the correct pH-neutral cleaners an essential cost-saving measure.