
The reason you can’t defeat hard water stains is that you’re fighting the wrong battle: you’re using anti-limescale products on a shield of soap scum.
- Standard cleaners fail because tough mineral deposits (limescale) are protected by a greasy layer of soap residue (soap scum).
- The professional solution is a two-step chemical attack: first, an alkaline cleaner to dissolve the soap scum, then an acidic cleaner to destroy the exposed limescale.
Recommendation: Stop scrubbing with a single product. Adopt the two-step “dissolve, then descale” method to finally see results.
If you live in an area with hard water, you know the endless frustration. You scrub your shower glass, tiles, and faucets, but a stubborn, cloudy film of limescale and soap scum always returns. You’ve probably tried every popular trick: hot vinegar, harsh scrubbing, and all-purpose cleaners that promise miracles but deliver mediocrity. For many residents in municipalities like Quebec City, this isn’t just a cleaning issue; it’s a constant battle against the very water in their pipes.
The common advice often misses a crucial scientific point. The problem isn’t just the chalky white mineral deposits known as limescale. It’s the resilient, greasy matrix of soap scum—a compound of soap residue and body oils—that forms a protective barrier over the limescale. Trying to remove mineral scale with an acidic cleaner like vinegar is like trying to wash a greasy pan with cold water alone; the grease shields the surface underneath. You’re working harder, not smarter.
But what if the key wasn’t more scrubbing, but a smarter chemical strategy? The secret professionals use is not a single “magic” product, but a targeted, two-step approach. It involves understanding the distinct chemical nature of each layer of grime and using the right tool for each job. First, you must dissolve the organic, greasy soap scum shield. Only then can you effectively attack the mineral-based limescale beneath it.
This guide will deconstruct this professional method. We will explore the science behind why certain deposits cling to specific surfaces, how to restore seemingly lost clarity to glass, and the critical mistakes to avoid that can permanently damage your fixtures. By the end, you will understand not just what to do, but why it works, empowering you to end the cycle of frustrating scrubbing for good.
To navigate this deep dive into the science of cleaning, here is a breakdown of the key areas we will cover, from diagnosis to prevention.
Summary: A Strategic Guide to Defeating Hard Water Stains
- Why Does Soap Scum Build Up Faster on Textured Tiles vs Smooth Surfaces?
- How to Restore Clarity to Cloudy Shower Glass Using Professional Techniques?
- Descaling Gel vs Liquid Spray: Which Clings Better to Vertical Surfaces?
- The Acidic Cleaner Mistake That Strips the Finish off Black Faucets
- How Using a Squeegee Daily Can Reduce Deep Cleaning Time by 50%?
- Why Does Urine Scale in Grout Lines Cause Smells That Won’t Go Away?
- The Hot Water Mistake That Evaporates Chlorine Before It Sanitizes
- Why Do Alkaline Cleaners Slowly Dissolve the Sealant on Granite Countertops?
Why Does Soap Scum Build Up Faster on Textured Tiles vs Smooth Surfaces?
The frustrating speed at which soap scum appears on certain tiles isn’t an illusion; it’s a matter of physics and chemistry. Smooth, glazed surfaces offer very little for soap residue and minerals to grab onto. Textured tiles and porous grout lines, however, act like a microscopic landscape of valleys and peaks. These textures dramatically increase the surface area, creating countless anchor points for the soap scum matrix to form and cling to. Each tiny crevice becomes a foothold for mineral deposits to build upon, layer by layer.
This physical advantage is compounded by the hard water common in many areas. For instance, water quality data shows that areas like Quebec City have hardness levels exceeding 200+ mg/L of calcium carbonate. When soap molecules react with these high concentrations of calcium and magnesium ions, they form an insoluble, waxy substance: soap scum. This scum doesn’t just sit on the surface; it becomes trapped within the tile’s texture, creating a stubborn, water-resistant shield over the underlying limescale.
This is why simply spraying an acidic cleaner rarely works on textured surfaces. The acid can’t penetrate the greasy, organic layer of soap scum to reach the mineral limescale beneath. To truly clean these surfaces, you must adopt a two-step strategy. First, use an alkaline degreaser to break down the fatty acids in the soap scum. Once that layer is dissolved and rinsed away, the mineral deposits are exposed and vulnerable to a follow-up treatment with an acidic cleaner, which can now effectively dissolve the limescale.
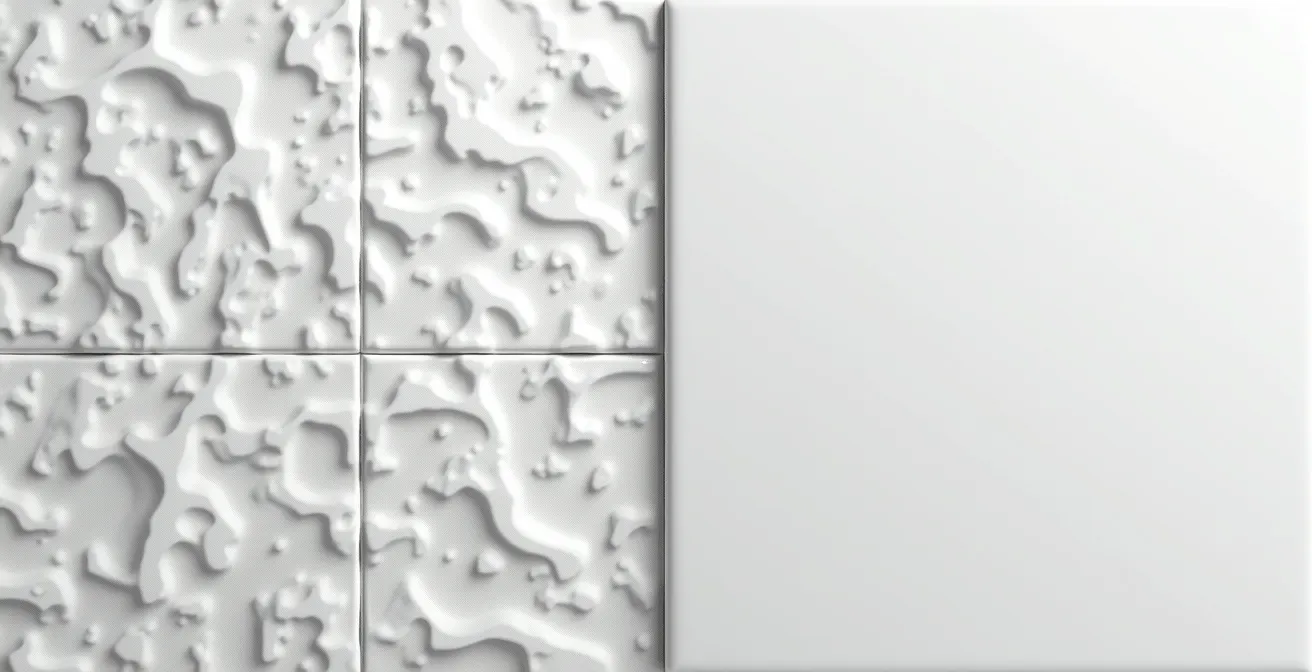
As this comparison highlights, the difference is stark. The smooth surface allows water and residue to sheet off, while the textured surface acts as a net, capturing deposits. Without addressing the soap scum layer first, any cleaning effort on textured tiles is bound to be a frustrating exercise in futility. The secret lies in a strategy of pH-targeted cleaning: alkaline for the grease, acid for the minerals.
How to Restore Clarity to Cloudy Shower Glass Using Professional Techniques?
When shower glass becomes permanently cloudy, it’s often a sign of a problem that goes beyond simple mineral deposits. This persistent fog is typically caused by chemical etching, a process where layers of limescale and soap scum create a micro-acidic environment that slowly corrodes the glass surface itself. At this stage, no amount of scrubbing with consumer-grade cleaners will restore clarity, because the damage is physical, not just a surface stain. This is where professional techniques become necessary.
While DIY solutions have their place for light maintenance, they are often outmatched by years of hardened buildup. A hot vinegar soak might remove light deposits, but it lacks the chemical power to reverse significant clouding and can take a long time to show minimal results. Professional-grade products containing sulfamic or phosphoric acid work much faster and more effectively, but require strict safety precautions. The key is to match the tool to the severity of the problem.
This table breaks down the effectiveness and safety of common methods, illustrating why professional-grade solutions are often required for tough restoration jobs.
| Method | Effectiveness | Application Time | Safety Considerations |
|---|---|---|---|
| Hot Vinegar Soak | Moderate – Good for light deposits | 30-60 minutes | Safe for glass, may damage finishes |
| Sulfamic Acid Cleaners | High – Professional grade | 5-15 minutes | Requires ventilation, protective gear |
| Baking Soda Scrub | Low-Moderate | 15-20 minutes | Safe, non-abrasive |
| CLR Products | High – Commercial strength | 2-3 minutes | Toxic, requires careful handling |
Case Study: When Cleaning Isn’t Enough
When a shower screen is neglected, the buildup of residue can slowly dissolve the glass surface in a process called chemical etching, creating permanent stains. Regular cleaners are useless against this type of damage. According to glass specialists at Union Rayo, the only effective remedy is to physically re-polish the glass surface using an extremely fine abrasive like cerium oxide. This is a delicate restoration job that should only be performed by a trained professional to avoid causing further scratches or distortion to the glass.
Descaling Gel vs Liquid Spray: Which Clings Better to Vertical Surfaces?
When tackling limescale on vertical surfaces like shower walls or glass doors, the greatest challenge is achieving sufficient dwell time. This is the length of time a cleaner remains in contact with a stain, which is essential for the chemical reactions to occur. Liquid sprays are convenient for application, but they immediately run down, offering only a few moments of contact before pooling at the bottom. This makes them highly inefficient for dissolving stubborn, hardened mineral deposits.
This is where the superiority of gel-based cleaners becomes evident. Their thick, viscous formula is specifically engineered to cling to vertical surfaces, resisting the pull of gravity. Instead of seconds of contact, a good gel can remain in place for extended periods, allowing its active ingredients to continuously work on breaking down the limescale. In fact, professional cleaning data demonstrates that quality gels can increase dwell time from under 2 minutes to over 10 minutes, a five-fold increase in chemical action without any extra effort.
For severely neglected surfaces, professionals sometimes employ a combo technique. They first prime the surface with a liquid spray to wet it, then immediately apply a thick layer of gel on top. The gel traps the liquid against the surface, preventing evaporation and maximizing penetration for 30 minutes or more. This approach combines the broad coverage of a spray with the powerful, sustained contact of a gel, delivering maximum dissolving power.
The choice between a gel and a spray is therefore a strategic one. For light, daily maintenance, a spray might suffice. But for any serious descaling job on a vertical plane, a high-adhesion gel is the only tool that provides the necessary dwell time to dissolve years of mineral buildup effectively and efficiently. It’s the embodiment of working smarter, not harder.
The Acidic Cleaner Mistake That Strips the Finish off Black Faucets
The rise of modern fixtures with matte black, oil-rubbed bronze, and other delicate finishes has introduced a new risk into bathroom cleaning. While acidic cleaners are the go-to solution for dissolving mineral-based limescale, they are indiscriminately corrosive. These acids cannot distinguish between the calcium carbonate in hard water stains and the delicate PVD (Physical Vapor Deposition) or powder-coated finishes on your expensive faucets. Applying a strong acidic cleaner, or even a prolonged soak in household vinegar, can strip this finish, causing irreversible discoloration and damage.
This is a costly mistake born from treating all surfaces the same. Anodized aluminum, brass, and especially colored finishes are highly susceptible to acid damage. The danger is so prevalent that even trusted sources issue warnings. As the Good Housekeeping Institute Cleaning Lab notes in their professional advice:
While you can soak the showerhead in vinegar, be wary that doing this could damage some finishes.
– Good Housekeeping Institute Cleaning Lab, Good Housekeeping Pro Tips for Cleaning
The only way to proceed safely is to assume a finish is sensitive until proven otherwise. This is where a crucial professional protocol comes in: the hidden spot test. Before applying any cleaner to a visible area, you must test it on an inconspicuous part of the fixture, such as the underside of the base or the area behind the handle. This simple step can save you from a costly replacement.
Your Action Plan: The Hidden Swab Test Protocol
- Apply a small amount of the cleaner with a cotton swab to an inconspicuous area.
- Choose a hidden test spot, like the underside of the faucet base or behind the handle against the wall.
- Wait for the recommended dwell time (or at least 10 minutes) and then wipe the area clean.
- Carefully inspect the spot for any signs of discoloration, dulling, or damage to the finish.
- If no damage appears, you can proceed with careful application. If you see any change, you must choose a pH-neutral cleaner instead.
How Using a Squeegee Daily Can Reduce Deep Cleaning Time by 50%?
The most effective way to combat hard water stains is to prevent them from forming in the first place. The single most powerful tool in this preventative war is a simple shower squeegee. After every shower, water droplets cling to glass and tile, loaded with dissolved minerals like calcium and magnesium. As these droplets evaporate, they leave their mineral content behind, forming the initial seed crystals for limescale buildup. A daily squeegee routine physically removes these droplets before they have a chance to dry.
This simple, one-minute habit is not just a minor improvement; it is a game-changer in bathroom maintenance. By mechanically wiping away the water, you are essentially performing a micro-cleaning after every use. This drastically reduces the amount of mineral deposits left on surfaces. The impact is staggering; according to industry data, professional cleaning services report that daily squeegee use prevents up to 95% of mineral buildup on shower doors. This means 95% of the material that would otherwise harden into stubborn limescale is simply never allowed to form.
The result is a dramatic reduction in the need for deep, chemical-based cleaning. Instead of a difficult, time-consuming descaling session every few weeks, a quick wipe-down with a pH-neutral cleaner may be all that’s required for monthly maintenance. The key, as noted by Texas Cleaning Services, is consistency. Using the squeegee after every single shower is what breaks the cycle of buildup and evaporation. It transforms bathroom maintenance from a reactive, difficult chore into a proactive, effortless habit.
By investing one minute after each shower, you save yourself hours of future scrubbing. A squeegee is not just a tool; it’s the best return on investment for anyone living with hard water, easily cutting deep cleaning frequency and effort in half, if not more.
Why Does Urine Scale in Grout Lines Cause Smells That Won’t Go Away?
Persistent, foul odors around a toilet, even after thorough cleaning, are often caused by urine scale embedded in the porous grout lines of the floor tile. This issue is far more complex than a simple surface stain. Urine is composed of both organic compounds (like uric acid) and inorganic mineral salts. When urine seeps into the microscopic canyons of cement-based grout, it creates a two-part problem. The uric acid crystals provide a continuous food source for odor-causing bacteria, while the mineral salts contribute to a hard, stubborn scale, similar to limescale.
Standard bathroom cleaners and disinfectants are ineffective against this deep-seated issue. Bleach might temporarily kill surface bacteria, but it doesn’t break down the underlying uric acid crystals or the mineral scale that protects them. This is why the smell inevitably returns. To permanently eliminate the odor, you must again use a two-pronged chemical attack: one to break down the organic components, and another to dissolve the mineral scale.
- Enzymatic Cleaner: First, apply an enzymatic cleaner designed to target organic waste. These products contain enzymes that specifically break down the uric acid molecules, eliminating the food source for bacteria.
- Acidic Cleaner: After the enzymatic cleaner has done its work and been rinsed away, use a phosphoric or sulfamic acid-based cleaner to dissolve the tough mineral scale that has formed.
Prevention is the best long-term solution. Sealing the grout lines creates an impenetrable barrier that prevents urine from seeping in. However, not all sealers are created equal, especially in a high-traffic, chemically-cleaned area like a bathroom.
| Sealer Type | Durability | Application Method | Best For |
|---|---|---|---|
| Penetrating Sealer | 3-5 years | Spray or brush application | Natural stone grout |
| Topical Sealer | 1-2 years | Roll-on application | Standard cement grout |
| Epoxy Sealer | 5-10 years | Professional application | High-traffic areas |
| Urethane Sealer | 7-10 years | Brush application | Maximum protection |
The Hot Water Mistake That Evaporates Chlorine Before It Sanitizes
In the quest for a sparkling clean bathroom, a common instinct is to use hot water, assuming it boosts cleaning power. While this is true for dissolving soap and grease, it’s a critical error when it comes to sanitizing. Most household disinfectants, including those containing chlorine (bleach) or quaternary ammonium compounds, are volatile and chemically unstable at high temperatures. When you mix bleach with hot water, the heat causes the active ingredient, sodium hypochlorite, to rapidly break down and release as chlorine gas. Not only is this a safety hazard that can irritate your lungs, but it also means the disinfectant is evaporating into the air before it has the chance to do its job on the surface.
Effective sanitation relies on a principle called contact time—the duration a disinfectant must remain wet on a surface to kill a specified percentage of germs. By using hot water, you drastically reduce this contact time and compromise the entire process. The sanitizing power is literally vanishing into thin air. For this reason, professional cleaning protocols, like those outlined by Lysol, always specify using cool or cold water (below 40°C) for dilution of disinfectants.
Furthermore, it’s crucial to understand the difference between cleaning and sanitizing. They are two distinct steps that must be performed in the correct order for sanitation to be effective. Soil, grime, and organic matter can shield germs from disinfectants. You must physically remove this soil first. The correct professional method is always:
- Step 1: Clean. Use a detergent or all-purpose cleaner with warm water to scrub the surface and remove all visible soil and residue.
- Step 2: Rinse. Rinse the surface thoroughly with clean water to remove any detergent residue that could interfere with the disinfectant.
- Step 3: Sanitize. Apply your disinfectant solution, diluted correctly with cold water, to the clean surface.
- Step 4: Wait. Allow the surface to remain wet for the full contact time specified on the product label (often 5-10 minutes). Do not wipe it dry prematurely.
Key Takeaways
- The primary mistake in cleaning hard water stains is using one product to fight two different problems: greasy soap scum and mineral-based limescale.
- The professional solution is a two-step method: use an alkaline cleaner (high pH) to dissolve soap scum first, then an acidic cleaner (low pH) to remove the exposed limescale.
- Prevention is key. Using a squeegee daily prevents over 90% of buildup, while choosing the right sealant for grout and stone protects them from damage.
Why Do Alkaline Cleaners Slowly Dissolve the Sealant on Granite Countertops?
While acidic cleaners pose a well-known threat to certain surfaces, highly alkaline cleaners present their own set of risks, particularly for sealed natural stone like granite. Granite itself is relatively durable, but the protective sealant applied to it is not. These sealants are typically acrylic or silicone-based polymers designed to fill the stone’s natural pores and prevent stains. However, these polymers are vulnerable to chemicals at the high end of the pH scale.
Many heavy-duty degreasers, oven cleaners, and even some “natural” all-purpose cleaners are strongly alkaline. When used repeatedly on a sealed granite countertop, these high-pH solutions begin to chemically break down the sealant. The process is slow and often goes unnoticed at first, but it is relentless. The cleaner is effectively dissolving the protective layer it’s meant to clean. As the sealant degrades, the granite becomes dull and is left vulnerable to staining from spills like wine, oil, or coffee.
The damage threshold is a critical factor. According to stone care experts, the danger zone begins once the pH level of a cleaner starts to climb. In particular, stone care specialists warn that cleaners with a pH above 10 can degrade sealants within months of regular use. This is why using a pH-neutral cleaner specifically formulated for stone is not just a recommendation, it’s an essential part of preserving your investment. To check if your sealant is intact, you can perform the “water droplet test”: place a few drops of water on the surface. If they bead up, the sealant is working. If the water soaks in and darkens the stone, it’s time to reseal.
Ultimately, protecting your surfaces comes down to a core principle of professional cleaning: pH-targeted cleaning. You must match the cleaner not only to the stain but also to the surface material. For routine cleaning of sealed stone, always opt for a pH-neutral (around pH 7) solution to ensure you are cleaning the surface without stripping its vital protection.
By understanding the distinct chemistry of both the stains and the surfaces in your home, you can move beyond frustrating scrubbing and adopt a smarter, more effective cleaning strategy. The next logical step is to equip yourself with the right tools and knowledge to implement this two-step approach safely and effectively in your own bathroom.